Okay, so picture this: I’m wrestling with a particularly stubborn garden hose. You know the kind, the one that’s seen better days, the one that’s probably older than some of the potted plants I’m trying to water. Anyway, I’m trying to unscrew it from the outdoor spigot, and it’s just… not budging. At all. It’s like it’s fused on with ancient tree sap and sheer willpower. Frustrated, I’m muttering all sorts of things under my breath, the kind of things you probably shouldn’t say within earshot of innocent hydrangeas. And then, my neighbor, a wonderfully patient woman who’s seen me through many a DIY disaster, pokes her head over the fence. “Having trouble there, dear?” she asks, a twinkle in her eye. I explain my hose predicament, and she chuckles. “Ah, the backflow preventer,” she says, as if it’s the most obvious thing in the world. Backflow preventer? I’d never even heard of it. I just thought my spigot was secretly a superhero with superpowers of adhesion. Little did I know, this little gizmo was the real culprit, and more importantly, a totally removable culprit.
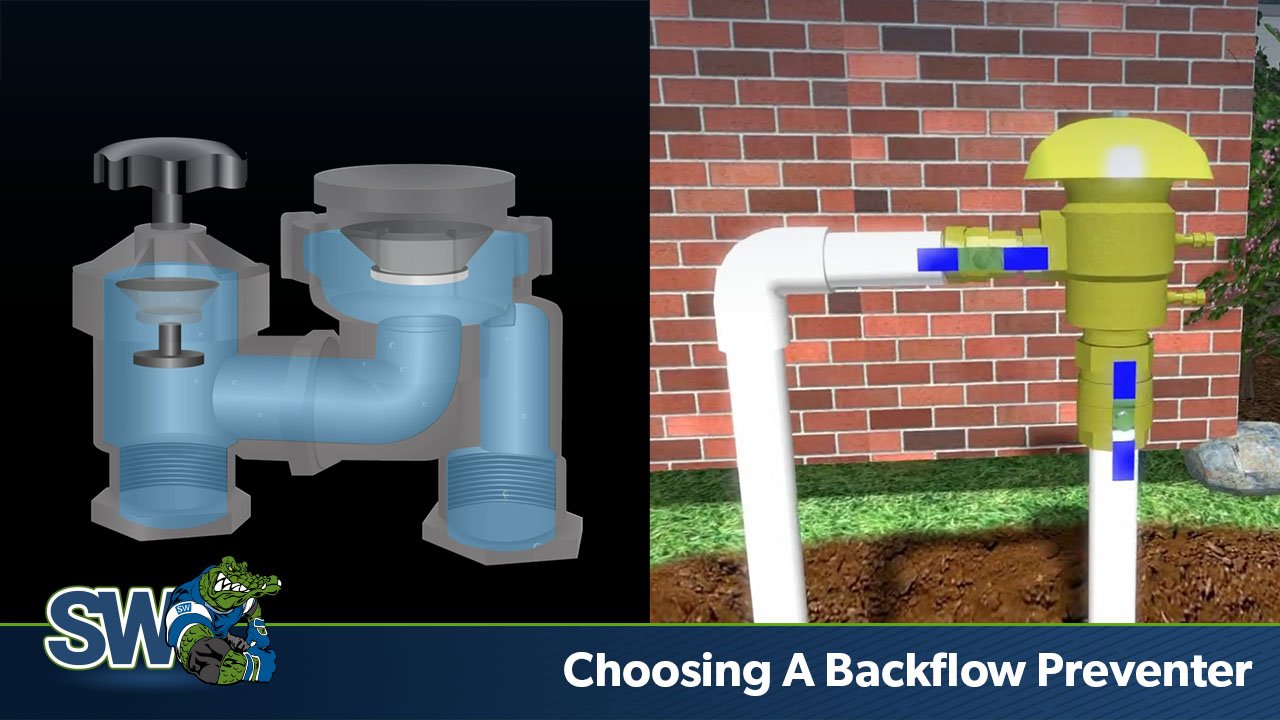
So, what exactly is this mysterious backflow preventer thingy? And why is it sometimes attached to your outdoor spigot, looking like it’s part of the furniture? Well, after a bit of sleuthing (okay, a lot of Googling and a slightly frantic call to my dad, who is apparently the resident plumbing guru), I’ve learned a thing or two. Think of it as a tiny guardian of your water supply. Its main job, and it’s a pretty important one, is to stop potentially contaminated water from flowing back into your clean drinking water pipes. Imagine, for a second, that your garden hose is submerged in a puddle of… well, let’s not even go there. If there wasn't a backflow preventer, that yucky stuff could be sucked right back into your house’s plumbing. Not exactly the kind of fresh water we’re aiming for, right?
These little fellas are usually a requirement in many places, especially for outdoor spigots and anything connected to them, like hose bibs. It’s all about safety and preventing a public health oopsie. So, while they’re super important for their intended purpose, sometimes, you just need to take ‘em off. Maybe you’re replacing your spigot. Maybe you’re installing a new hose. Or maybe, just maybe, you’re dealing with a hose that’s decided to permanently bond with your spigot, and you need to get it off without resorting to a chainsaw (though I’ve been tempted, believe me).
The good news? For the most part, removing a backflow preventer from a spigot is usually a pretty straightforward DIY job. It’s not like you need a plumbing license or a degree in advanced pipe whispering. You just need a few basic tools and a little bit of patience. And maybe a beverage of your choice to sip on while you’re working. Hydration is key, people!
So, You Want to Unhook This Water Guardian? Here’s How.
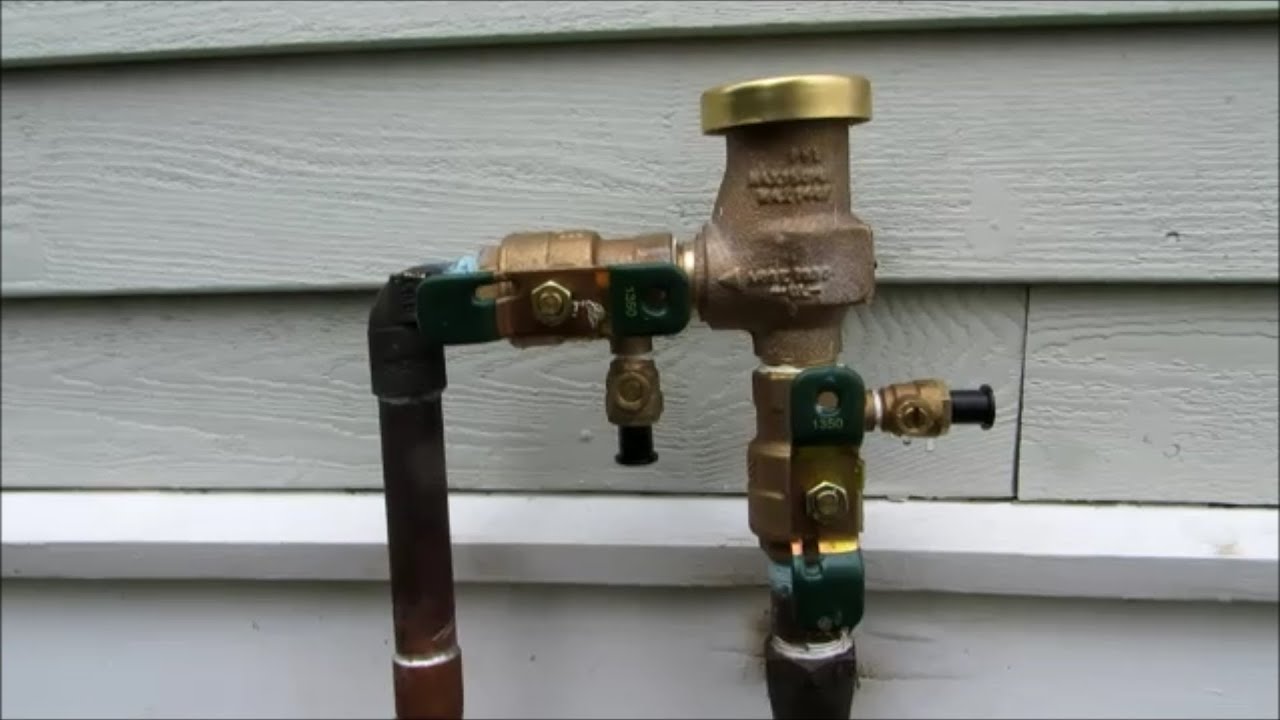
Alright, let’s get down to business. You’ve identified the backflow preventer. It’s usually a small, cylinder-shaped device that screws onto the threads of your spigot. Sometimes, it has a little lever or a dial on it, which is how you might test if it’s working (though we’re not focusing on testing today, just removal!).
The most common type you'll encounter on an outdoor spigot is a simple screw-on type. It’s designed to be removed without, you know, demolishing your entire plumbing system. Think of it as a well-intentioned but sometimes inconvenient houseguest. You can politely ask it to leave.
Step 1: Gather Your Tools (The Usual Suspects)
Before you go rummaging through your toolbox like a squirrel preparing for winter, let’s make sure you have what you need. You won’t need anything too fancy, thankfully.
Here’s your essential kit:
- Adjustable Wrench (or Pliers): This is your main weapon. An adjustable wrench is great because it can fit a variety of nut sizes. If you don't have one, a sturdy pair of channel-lock pliers can also do the trick. Just make sure they have a good grip!
- Rag or Cloth: This is for a couple of reasons. First, it can give you a better grip on the backflow preventer, especially if it’s a bit slippery. Second, it can help protect the finish of your spigot and the preventer itself from getting scratched by the wrench. We like to keep things looking pretty, right?
- A Little Patience: This is arguably the most important tool. Sometimes things are stubborn. Don't get frustrated. Take a deep breath. Maybe hum a little tune.
That’s pretty much it! See? I told you it wasn’t rocket science. Though, if you were launching rockets, I’m pretty sure you’d need more advanced tools than this.
Step 2: Turn Off the Water (Seriously, Don’t Skip This!)
This is the golden rule of any plumbing work, no matter how small. You absolutely, positively must turn off the main water supply to your house. Why? Because if you don’t, you’re going to have a rather enthusiastic water feature erupting from your spigot the moment you loosen the backflow preventer. And trust me, you don’t want to be explaining to your significant other why the patio is now a temporary indoor swimming pool.
So, find your main water shut-off valve. It's usually in the basement, near where the water line enters your house, or sometimes in an outdoor utility box. Give it a good turn until the water is completely shut off. To double-check, turn on a faucet somewhere in your house and make sure no water is coming out. Ah, peace. Or at least, the potential for peace.
Now, if you’re only dealing with an outdoor spigot and you know there’s a shut-off valve specifically for that spigot (sometimes there’s one inside the house before the pipe goes outside), you could theoretically just turn that one off. But honestly, for peace of mind and to ensure you’ve completely isolated the area, shutting off the main is the safest bet. Better safe than soggy, right?
Step 3: Loosen Up!
Okay, water’s off. Tools are ready. You’re feeling confident. It’s time to get that backflow preventer off.

Wrap your rag around the body of the backflow preventer. This is where your adjustable wrench or pliers come in. You’ll want to get a good grip on the part of the backflow preventer that screws onto the spigot. Look for a hexagonal or flat section on the preventer itself. That’s your target.
Now, here’s the crucial part: you need to turn it in the direction that loosens it. This is usually counter-clockwise. Think “lefty-loosey.” If you’re facing the spigot, you’ll be turning the wrench to your left.
Apply steady, firm pressure. Don’t go all Hulk Hogan on it. If it feels incredibly tight and won’t budge, don’t force it to the point where you risk breaking something. Sometimes, a little wiggle or a different angle can help. If it’s really stuck, a tiny bit of penetrating oil (like WD-40, but be sure to clean it off thoroughly afterwards if you’re concerned about water contamination later) can sometimes help break the seal. Let it sit for a few minutes, then try again.
You might hear a little pop or creak as it loosens. That’s usually a good sign! Keep turning until it’s completely unscrewed. Congratulations, you’re halfway there!
Step 4: Remove the Backflow Preventer
Once it’s loosened enough, you should be able to unscrew it the rest of the way by hand. Gently twist and pull it away from the spigot.
Inspect the threads on both the spigot and the backflow preventer. Make sure there aren’t any little bits of debris or old Teflon tape stuck on them. If there is, gently clean them off with your rag or a soft brush. This will be important if you’re putting a new one on, or if you’re reconnecting a hose.
And there you have it! The backflow preventer is officially removed. High five yourself. You’ve conquered the water guardian!
When Things Get a Little… Tricky
Now, what if it’s not so simple? What if your backflow preventer looks different, or it’s just plain refusing to cooperate?
Different Types of Backflow Preventers
While the screw-on type is the most common for outdoor spigots, you might encounter other variations. Some might have a built-in vacuum breaker, which can sometimes make them a bit bulkier. The removal process is usually similar – find where it connects to the spigot and unscrew.
If you have a more complex system or a very old spigot, you might have something that’s threaded in a different way, or it might be more integrated into the spigot body. In these cases, it’s always better to err on the side of caution. If you’re unsure, or if it feels like you’re going to break something, it’s time to call in the cavalry.
Stubborn Spigots and Backflow Preventers
As I mentioned earlier, sometimes these things are really stuck. I’ve been there. When a simple wrench turn isn’t cutting it:
- Penetrating Oil: A little goes a long way. Spray it on the threads where the backflow preventer meets the spigot. Let it sit for 15-30 minutes, or even longer if it’s really stubborn. Then, try again with the wrench. Be sure to clean the spigot thoroughly afterwards if you’re planning on using it for drinking water or watering edibles.
- Gentle Tapping: Sometimes, a few gentle taps with a rubber mallet (or the handle of your wrench wrapped in a cloth) on the side of the backflow preventer can help loosen it. Don’t go smashing it! It’s about vibration, not destruction.
- Heat (Use with Extreme Caution!): In rare, very stubborn cases, a little bit of heat can help expand the metal slightly, breaking the seal. Use a hairdryer on a high setting or a heat gun very carefully and briefly on the backflow preventer itself, not the spigot. This is a last resort, and you need to be absolutely certain there are no flammable materials nearby and that you don’t overheat anything. If you’re not comfortable with this, skip it. Seriously.
If you try these methods and it’s still stuck fast, or if you’re worried about causing damage, it’s time to call a plumber. They have specialized tools and the experience to handle tricky situations without making things worse. And honestly, sometimes it’s worth the peace of mind (and the avoidance of a plumbing bill that’s higher than a professional contractor's hourly rate!).
Why Would You Even Remove It?
So, besides my initial hose-attachment saga, why might someone want to remove their backflow preventer?
- Replacing the Spigot: If your spigot is leaking, corroded, or just generally past its prime, you’ll likely need to remove the backflow preventer to swap out the old spigot for a new one.
- Hose Compatibility Issues: Some older hoses, or certain specialized hoses, might not have the standard threading that mates with a backflow preventer. Or, as in my case, the connection might have become so tight that removing the hose without removing the preventer is a Herculean task.
- Repairing the Spigot: If the spigot itself has a leak that seems to be coming from within, you might need to remove the preventer to access internal components for repair or replacement.
- Winterization: Sometimes, especially in colder climates, people remove certain fixtures like backflow preventers for winter to prevent them from freezing and cracking.
- Installing a Different Device: You might be replacing it with a different type of attachment, like a specialized water timer or a splitter, that requires a direct spigot connection.
Whatever your reason, now you know the drill. It’s a simple process that can save you a bit of hassle and a potential plumbing emergency. Remember to turn off the water, use the right tools, and be patient.
And the next time you encounter a stubborn hose, or you’re curious about what that little cylinder on your spigot does, you’ll have the knowledge. You’ll be a backyard plumbing guru in no time! Now go forth and conquer those spigots!