Hey there, DIY enthusiast! Ever found yourself staring at a bare patch of wall, perhaps just begging for a little towel space, next to your sparkling new shower surround? You know the feeling. That awkward transition where the pretty, waterproof surround meets the… well, the decidedly un-waterproof drywall. It’s like a party where one guest is dressed in a full scuba suit and the other is in a tuxedo. They don't quite mesh, do they?
But guess what? Finishing that drywall around your shower surround isn't some daunting, soul-crushing chore reserved for seasoned contractors with nerves of steel and an uncanny ability to mix mud without looking like a Jackson Pollock painting gone wrong. Oh no, my friend! It’s actually a pretty empowering and, dare I say, fun little project that can bring a surprising amount of satisfaction. Think of it as the finishing touch, the stylish scarf that completes your bathroom's outfit. And who doesn’t love a good outfit?
So, let's dive in, shall we? We’re not aiming for perfection that would make Michelangelo weep with envy, but rather for a functional, attractive finish that says, "I totally got this!" And honestly, the feeling of accomplishment when you step back and admire your handiwork? Priceless. Plus, you’ll have a newfound appreciation for… well, for walls that don't leak. Revolutionary, I know!
The "Why Bother?" Factor: More Than Just Pretty Walls
Before we grab our tools, let’s talk about why this little bit of drywall work is actually a big deal. You’ve invested in a gorgeous shower surround, right? It’s all shiny and sleek and promises blissful, steamy showers. But if that drywall isn't properly finished and sealed around the edges, all that moisture is going to find a cozy new home. And by "cozy new home," I mean behind your walls, where it can wreak havoc like a tiny, unwelcome roommate throwing a moldy party. Nobody wants that kind of party.
A properly finished surround means water stays where it belongs: in the shower, not seeping into your walls. This protects your home from costly damage and, let’s be honest, saves you from the ick factor of potential mold growth. It’s about preserving your sanity and your investment. Plus, a clean, seamless finish just looks so much more professional and put-together. It’s the difference between a hastily thrown-together meal and a beautifully plated gourmet dish. And you deserve gourmet.
Gathering Your Arsenal: Your Drywall Sidekicks
Don’t worry, you don’t need a superhero belt filled with gadgets. Most of what you’ll need is probably hanging out in your garage or can be snagged at your local hardware store without breaking the bank. Let’s get you prepped!
- Drywall Tape: This is your sticky little friend. You can go for paper tape (classic!) or self-adhesive fiberglass mesh tape (super convenient!).
- Joint Compound (Mud): This is the magical paste that smooths things out. You’ll want a lightweight all-purpose compound for this job.
- Putty Knives and Trowels: A few different sizes will be helpful. Think of these as your mud-spreading magic wands.
- Utility Knife: For precise trimming and getting into those tight spots.
- Sandpaper: Fine-grit sandpaper is your friend for achieving that silky-smooth finish.
- Caulk Gun and Caulk: The final frontier of water protection! Get some 100% silicone caulk designed for bathrooms.
- Screwdriver (or Drill/Driver): If you need to secure any loose drywall pieces.
- Primer and Paint: To make it all look cohesive and lovely.
- A Bucket: For mixing mud (if you opt for a powder version) or just for general gunk collection.
And of course, a good attitude and a willingness to get a little messy. Embrace the mud! It washes off, I promise.
The Grand Entrance: Preparing the Stage
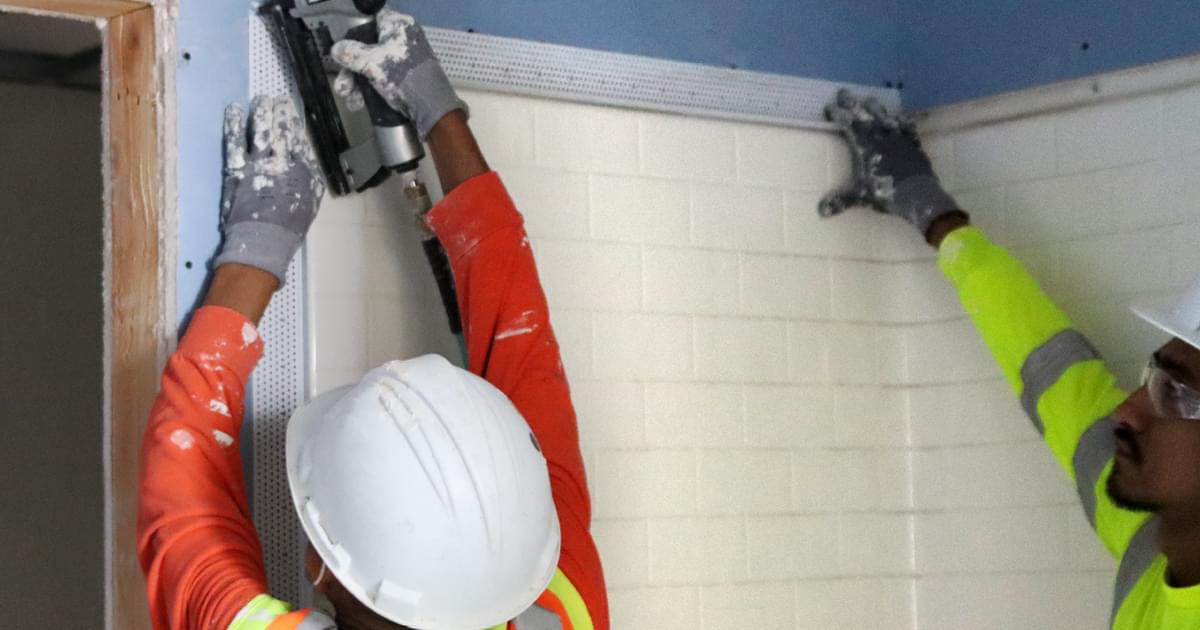
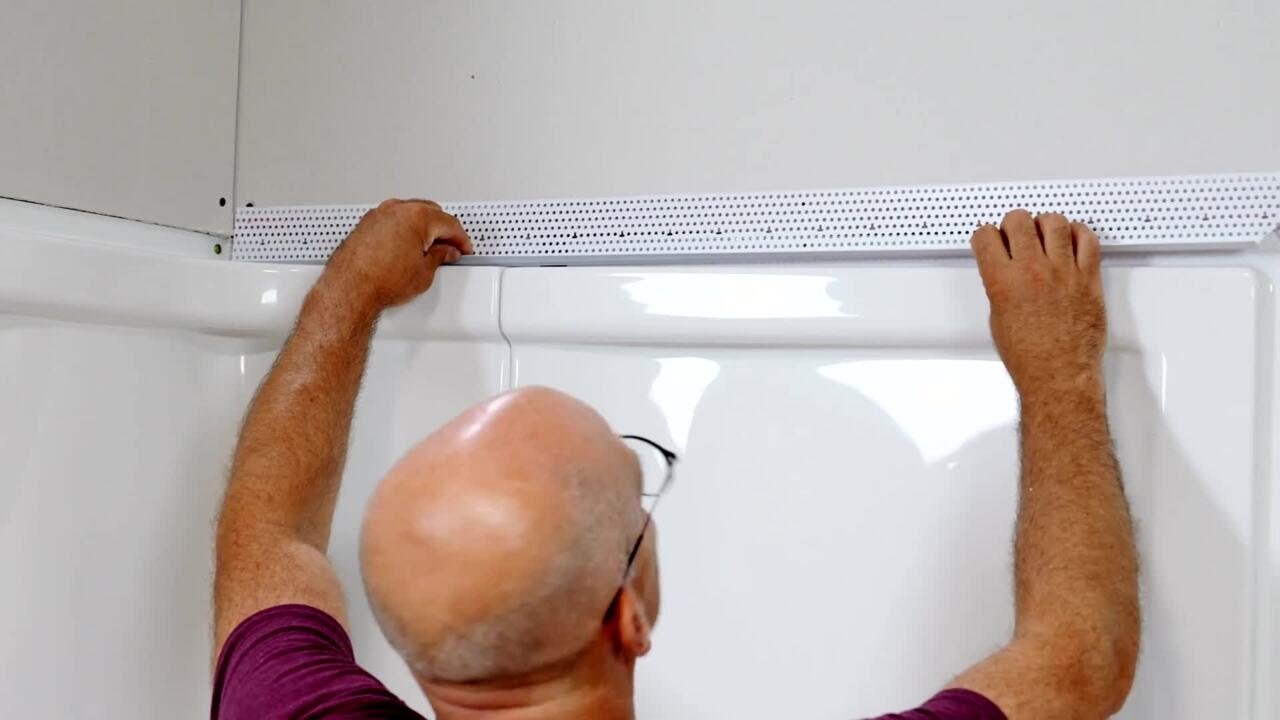
Before we get to the exciting part (mudding!), a little prep work is key. Think of it as setting the mood for a fabulous performance. First, ensure your shower surround is securely installed according to its manufacturer's instructions. You don’t want any wobbly bits when you’re trying to plaster!
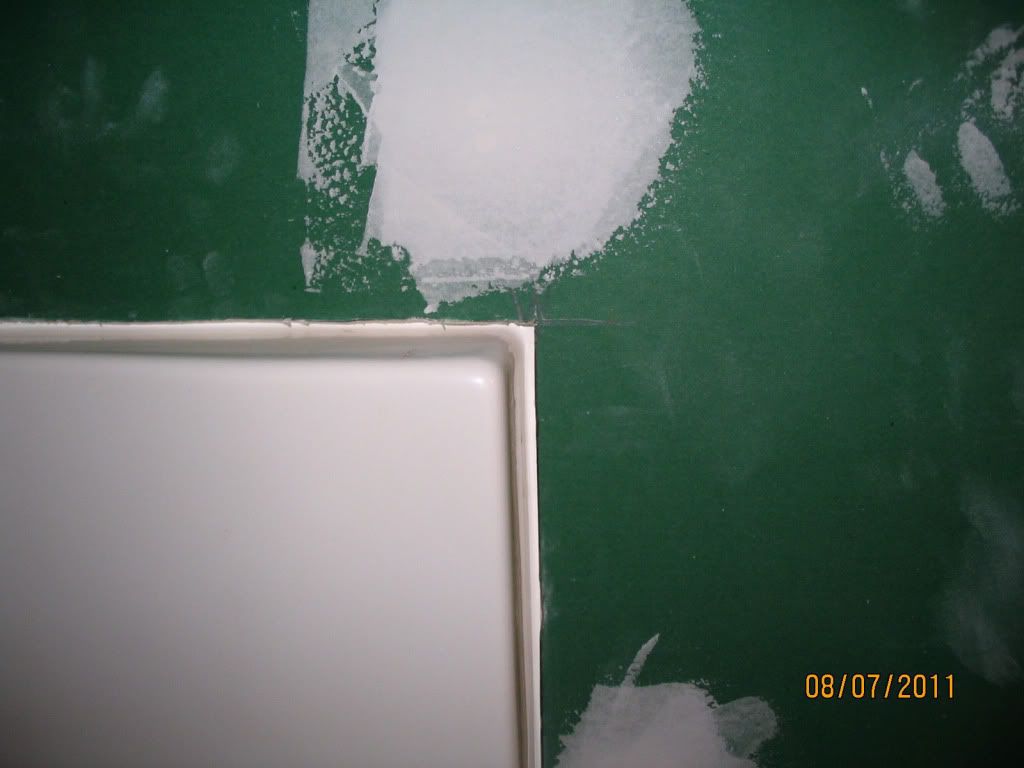
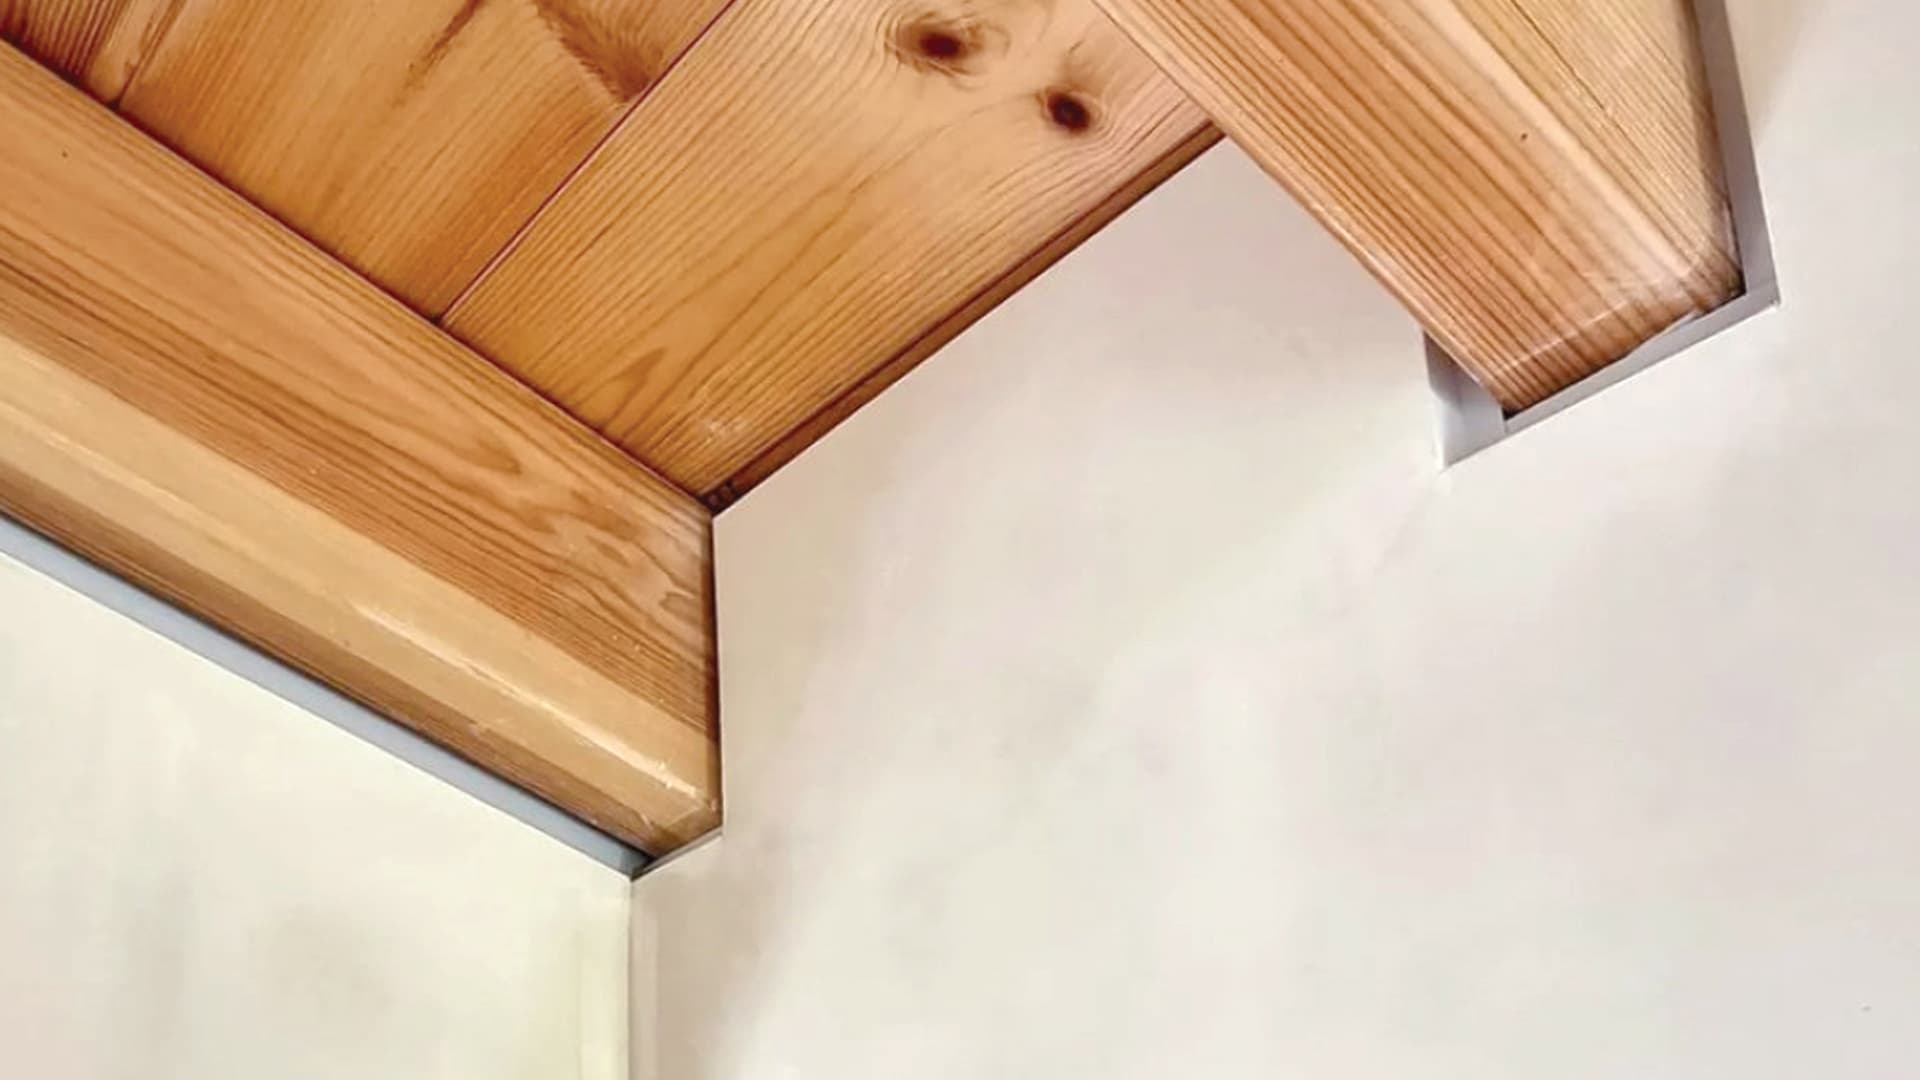
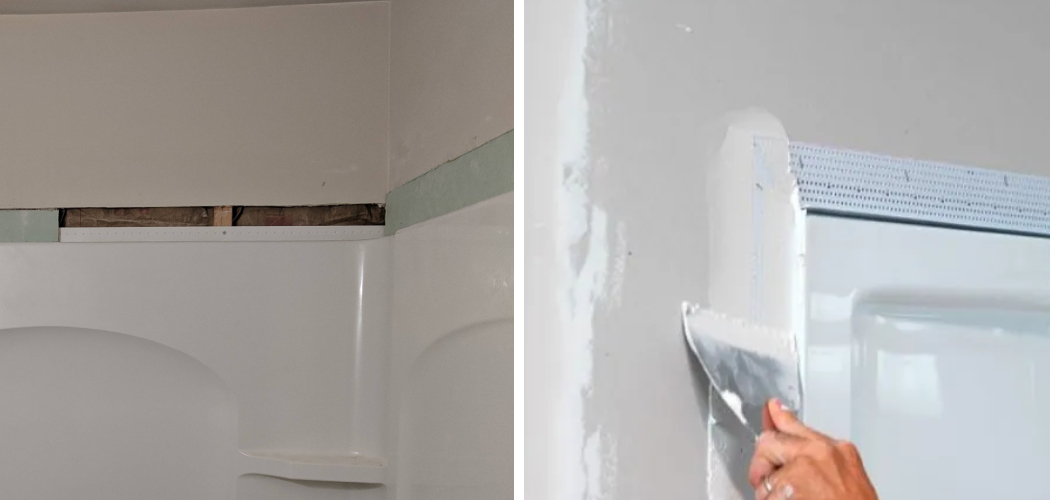
Next, take a peek at the edge where the surround meets the drywall. Is there a gap? Of course there is, that's why we're here! If the drywall itself is damaged or has any loose bits, now's the time to trim them away with your utility knife. You want a clean, solid edge to work with. It’s like tidying up the edges of a beautiful photograph before framing it. Presentation matters!
If you're working with a pre-existing shower surround that has a lip or flange where the drywall meets it, you'll want to make sure that area is clean and dry. This lip is your best friend because it provides a solid surface for the tape and mud to adhere to.
The Art of the Lap: Taping Your Way to Smoothness
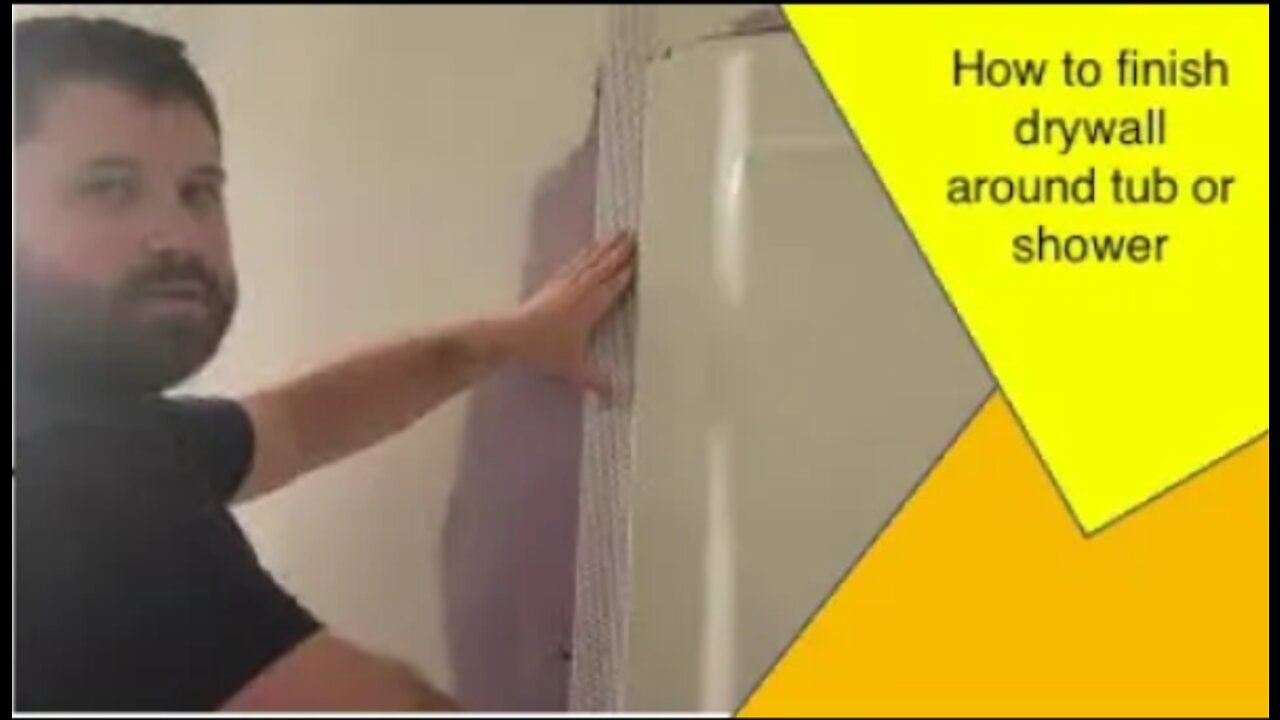
Alright, here comes the fun part! This is where we create a bridge between your surround and your drywall. If you’re using paper tape, you’ll need to apply a thin layer of joint compound along the edge where the drywall meets the surround. Then, gently press the paper tape into the wet mud, smoothing it out with your putty knife to eliminate air bubbles. You want it to be like a seamless extension of the wall.
If you're using the self-adhesive fiberglass mesh tape, it's even simpler! Just peel off the backing and stick it firmly along the seam. Voila! Instant connection. This tape is fantastic because it’s pre-formed and easy to handle. It’s like the pre-cut, pre-seasoned ingredients for a chef. Effortless deliciousness (of the wall variety, of course).
Now, here's a pro-tip that will make your life so much easier: don't use too much mud. It’s tempting to slather it on, thinking more is better. But trust me, a thin, even layer is what you want. You can always add more, but taking it off can be a pain. Think of it as a delicate dance, not a mud-wrestling match.
The Layering Dance: Building Up the Beauty
This is where patience becomes your superpower. Drywall finishing usually involves multiple thin coats, not one giant goop-fest. After your initial tape is in place, let it dry completely according to the compound manufacturer’s instructions. This might take a few hours, or even overnight, depending on humidity and thickness. Don’t rush it!
Once dry, it’s time for your first feather coat. This means applying another thin layer of joint compound, extending it a bit wider than the tape. The goal here is to feather the edges, making the transition from the tape to the drywall almost imperceptible. Use your putty knife or trowel to spread the mud thinly and evenly, working from the center outwards.
Let that layer dry completely. Then, you’ll repeat the process. You might need two or three feather coats to achieve a nice, smooth finish. Each coat should be a little wider than the last, gradually blending the taped area into the existing drywall. Think of it like building up layers of frosting on a cake – each layer refines the shape and smoothness.
Between coats, and especially after your final coat has dried, it's time for some gentle sanding. Use your fine-grit sandpaper to smooth out any ridges or imperfections. You're aiming for a surface that feels as smooth as a baby’s bottom! But do it gently; you don’t want to sand through your tape or your mud. A light touch is key.
The Final Frontier: Caulking and Cuddling
You’re almost there! You’ve mastered the mud, conquered the sanding, and your drywall is looking smoother than a jazz saxophone solo. Now, for the ultimate protection and a beautiful, clean finish: caulk! This is where you seal the deal, literally.
Run a bead of 100% silicone caulk along the entire seam where your shower surround meets the finished drywall. Make sure it’s a continuous, even bead. Then, use a damp finger or a caulk-smoothing tool to create a clean, slightly concave bead. This is what gives you that professional, seamless look and, more importantly, that impenetrable barrier against water. It’s the final handshake between your wall and your shower – a promise of dryness and durability.
Let that caulk cure completely according to the product instructions. Once it’s dry, you're ready for the grand finale: primer and paint! Apply a coat of good quality primer to your newly finished drywall, and then follow up with a fresh coat (or two!) of paint. Choose a paint that's suitable for bathrooms – something with good moisture and mildew resistance. And there you have it! A beautiful, seamless transition that’s both functional and fabulous. You’ve just leveled up your bathroom game, and you did it yourself!
Your Next Adventure Awaits!
See? Not so scary, right? Finishing drywall around a shower surround is a skill that’s incredibly rewarding and surprisingly accessible. It’s a little bit of patience, a touch of technique, and a whole lot of satisfaction. You’ve not only protected your bathroom but also added a beautiful, polished finish that you can be proud of. Every time you step into that shower, you'll know you made it happen.
This is just one of those many home improvement projects that, once you learn it, opens up a whole new world of possibilities. Don't stop here! Think about all the other little things around your home that could use a touch of your newfound DIY magic. So go ahead, embrace the challenge, and keep learning. Your home, and your sense of accomplishment, will thank you for it!