Alright, picture this. You're deep into that DIY project you've been dreaming about for months. You’ve got the plans, you’ve got the wood, you’ve got that boundless optimism that only a weekend warrior can truly possess. And then, BAM! You realize you need to make a fancy corner, a perfectly mitred joint that looks like it stepped right out of a professional woodworking magazine. Suddenly, your trusty circular saw, which has been a champ at chopping straight lines, feels a bit… well, one-dimensional. You stare at it, then at the wood, then back at the saw, a tiny seed of doubt sprouting in your mind. "Can this thing even do that?" you mutter, as if the saw itself is personally offended by your lack of faith.
Oh, it can, my friends. It absolutely can. And not only can it do it, but with a little bit of know-how and a dash of patience, you can be cutting those glorious 45-degree angles like a seasoned pro. We're talking about those seamless corners, those picture frames that don't have embarrassing gaps, those bookshelf shelves that meet each other with a proud, snug embrace. It’s the little things, you know? The details that elevate your project from "looks okay" to "wow, you made that?"
So, let’s ditch the anxiety and get down to business. This isn't some arcane ritual reserved for the woodworking elite. This is practical, achievable stuff. Think of me as your slightly-more-experienced-but-still-messing-up-sometimes buddy, guiding you through this. We'll keep it light, we'll keep it real, and by the end of this, you’ll be looking at your circular saw with newfound respect… and maybe a little bit of swagger.
The Not-So-Scary 45-Degree Angle
So, what’s the big deal with a 45-degree angle? In the grand scheme of things, it’s just a specific tilt. But in the world of woodworking, it’s everything when it comes to corners. Imagine trying to build a square box without 90-degree corners. Impossible, right? Well, a 45-degree angle is half of that 90. It's the building block for perfect hexagons, for those elegant picture frames, and for so many other joinery techniques. Get it right, and your project instantly looks polished. Get it wrong, and you’re staring at a gap that’s wider than your enthusiasm for sanding.
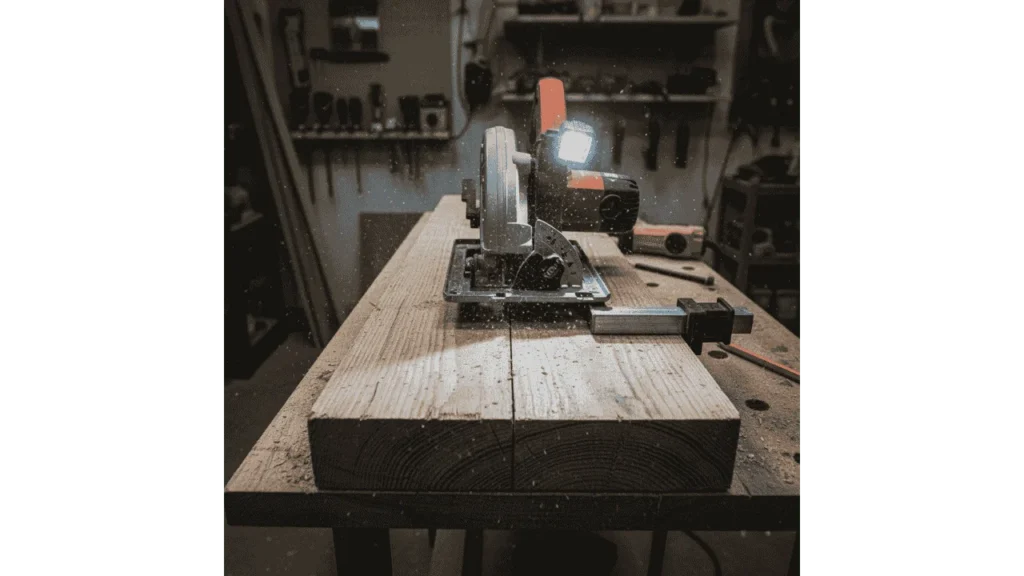
The good news is that most modern circular saws are designed to handle this. It’s not some hidden feature; it’s built right in. You might just need to locate the magic knob or lever that lets you adjust the blade’s angle. Don't worry if yours looks a bit different from mine; the principles are generally the same. We’re all just trying to make that spinning metal disk cut wood at a jaunty angle.
Finding Your Saw's Angle Adjustment
Okay, first things first. You need to find the gizmo that lets you tilt your blade. Usually, it’s located somewhere near the base of the saw, that flat metal plate that rests on the wood. Look for a lever, a knob, or sometimes a scale with degree markings. You might even see a little indicator that points to different angles.
Pro tip: Before you even think about plugging the saw in, get familiar with your specific saw. Read the manual if you’re feeling particularly studious, or just go exploring. Gently try to move the adjustment. Sometimes they can be a bit stiff, especially on older saws. A little wiggle and jiggle might be required. Don’t force anything, though!
On many saws, there’s a lever that you need to lift or push to unlock the base. Once unlocked, you can tilt the base to the desired angle. There's usually a notch or a marking for 45 degrees. It's like a little handshake between you and your saw, agreeing to make that perfect cut.
Setting Up for Success (and Accuracy!)
Now that you know how to unlock the angle, let’s talk about setting it accurately. This is where the magic (and the potential for frustration) happens. You want that 45 degrees to be actual 45 degrees, not a "close enough for government work" 44.7 degrees. Because wood, bless its fibrous heart, doesn't forgive minor inaccuracies in joinery. Little gaps tend to grow into bigger problems.
The Importance of the 45-Degree Mark
Most saws will have a scale printed on the base plate or a separate indicator. Look for the 45-degree mark. It's usually a clear line or a number. When you’re tilting the base, aim for that mark. You might want to give it a little nudge to make sure it’s seated firmly against the stop or against the indicator.

But here's a little secret: sometimes those built-in markings aren't perfectly calibrated. Especially on older or well-used saws. So, while the markings are your starting point, it's a good idea to double-check your work. How? With a protractor! Yes, the same kind you might have used in school. A small, cheap one is perfectly fine.
When the saw is set to 45 degrees (or what you think is 45 degrees), place the protractor on the base plate and measure the angle of the blade. You might have to get a bit creative with how you position it, but aim to measure the angle the blade makes with the edge of the base plate. If it’s not quite 45, you might be able to make tiny adjustments until it is. This is the kind of attention to detail that separates a good project from a great one.
Using a Speed Square or Combination Square
Another fantastic tool for this is a speed square or a combination square. These are invaluable for any DIYer. When your saw is tilted to 45 degrees, you can place the edge of your speed square along the edge of the base plate (the part that rides on the wood). The other edge of the speed square should be perfectly parallel to the blade itself. Or, if your speed square has a 45-degree marking, you can check that it aligns perfectly with the blade.
This is a quick and dirty way to confirm your setting without needing a protractor every single time. Once you’ve confirmed your saw’s 45-degree setting is accurate (or at least accurate enough for you), make a mental note of how it feels or looks. You'll get a knack for it.
Marking and Cutting Your Wood
Alright, the saw is set. The angle is (hopefully) true. Now it’s time to actually cut some wood! This is where your measuring tape and pencil come into play, but with a slightly different approach than your usual straight cuts.
The Power of the Miter Line
When you’re making a standard 90-degree cut, you typically mark a line on your wood and line up the edge of your saw’s base plate with that line. For a 45-degree cut, it’s a bit more nuanced. You’re not just cutting across the wood; you’re cutting at an angle to the edge of the wood.
Imagine you’re making a corner for a picture frame. You have two pieces of wood that will meet at a right angle. Each piece needs a 45-degree cut, but they need to be cut in opposite directions so they can join together. This is crucial! If you cut both pieces with the same 45-degree angle, you’ll end up with a point, not a corner.

So, let’s say you have a piece of wood and you want to cut one end at 45 degrees. You’ll measure to your desired length. Then, instead of drawing a line straight across the width of the board, you’ll draw a line at a 45-degree angle to the edge. You can use your speed square for this. Draw a line that starts at your measurement point and angles inward or outward, depending on which side you want the cut to be.
Here’s a handy tip: When you make your first 45-degree cut on a piece of wood, use that cut edge to mark the angle on the next piece. You can place the angled edge against the fence of your saw (if you're using one) or against another piece of wood, and then draw a line using your pencil. This is often more accurate than relying solely on a drawn line.
The Blade Kerf Consideration
Now, about that spinning blade. It’s not a laser beam; it has a width, called the kerf. This means when you cut, you’re removing a small amount of wood. You need to account for this when you’re marking your cut line. Do you line up the edge of the blade with your line, or the center of the blade? Or the other edge?
For precise 45-degree cuts, especially for joinery, it's usually best to have the inside edge of the blade just kissing your pencil line. This means the blade will cut on your line, removing the pencil mark and leaving you with a clean edge.
Before you commit to the cut, do a practice cut on a scrap piece of wood. Set up your 45-degree angle, mark your line, and make the cut. Then, take that cut piece and try to join it with another piece that you've also cut at 45 degrees (in the opposite direction, remember!). See if it makes a nice, tight corner. If there's a gap, you might need to adjust your line marking or your saw's angle slightly.
Safety First, Always!
I know, I know, it's the boring part. But honestly, when you're dealing with a powerful tool like a circular saw, especially when you're maneuvering it at angles, safety has to be paramount. Skipping this is like trying to cook a fancy meal without washing your hands – a bad idea.
Eye Protection is Non-Negotiable
Sawdust is not your friend. It gets everywhere, it’s irritating, and in the worst-case scenario, a rogue piece of wood or a flying splinter can cause serious eye injury. So, wear safety glasses or goggles. Every. Single. Time. No exceptions. Even for a tiny little cut. Trust me, your eyes will thank you.
Hearing Protection is Your Buddy
Circular saws are loud. Really loud. Prolonged exposure to that noise can lead to permanent hearing damage. So, invest in some earplugs or earmuffs. You might feel a bit silly at first, but your future self will be incredibly grateful.

Keep Your Hands (and Other Body Parts) Away!
This seems obvious, but in the heat of the moment, it’s easy to get a little too close. Always keep your hands a safe distance from the blade. Make sure the power cord is out of the way. Don’t overreach; move the wood or reposition yourself if you need to.
The blade guard is there for a reason. Don’t be tempted to disable it or hold it back. It’s a crucial safety feature designed to retract as you cut and snap back into place to cover the blade when you’re not actively cutting. Let it do its job.
Stable Work Surface and Secure Clamps
Your wood needs to be stable. If it’s wobbling around while you’re trying to cut, you’re asking for trouble. Use a workbench or a stable sawhorse. And for added security, clamp your workpiece down firmly. This prevents movement during the cut, ensuring a cleaner line and keeping your hands safer.
When you're making those 45-degree cuts, the base plate of your saw needs to be flat on the wood. If the wood is slightly uneven, or if you're cutting something with an irregular shape, be extra careful to maintain contact between the base plate and the wood. This is where a good clamping job really pays off.
Common Pitfalls and How to Avoid Them
Even with all the best intentions, sometimes things don’t go perfectly. It’s part of the learning process. But knowing what can go wrong can help you prevent it. Let’s look at some common blunders.
The "Oops, I Cut the Wrong Way" Mistake
This is the classic. You need two 45-degree cuts that face each other to form a corner. You accidentally cut both the same way. Result? A pointy piece of wood or a shape that looks like an angry chevron. Always double-check the direction of your 45-degree angle before you make the cut. Imagine how the pieces will fit together.
The Inconsistent Angle
Your saw’s 45-degree setting might not be as precise as you think, or maybe you didn’t lock it in properly. This leads to gaps in your corners. Re-check your saw’s calibration periodically. A quick test with a protractor or speed square is a good habit.

The Wobbly Cut
This is usually caused by the wood not being securely clamped or by a dull blade. A dull blade requires more force to push through the wood, making it harder to maintain a steady hand and a clean cut. Make sure your blade is sharp and that your workpiece is firmly secured. A slow, steady cut is usually best for accuracy.
The "Almost" Cut
You think you’ve lined up perfectly, but you end up slightly off. This is often due to the kerf issue. Practice lining up the blade with your pencil line. Understanding where the blade will actually cut relative to your line is key. A fine-point pencil and a steady hand help.
Don’t be discouraged if your first few attempts aren’t perfect. Woodworking is a skill that develops with practice. Each cut, even the slightly wonky ones, teaches you something. Think of them as "learning cuts" rather than "mistakes."
Beyond the Basics: Advanced Tips and Tricks
Once you’ve got the hang of basic 45-degree cuts, you might want to explore some more advanced techniques. These can make your projects look even more professional.
Using a Miter Gauge with a Circular Saw (Handheld)
This is a bit trickier with a handheld circular saw, but it’s possible. Some people will create a simple jig that acts like a miter gauge, guiding the saw at a precise angle. This is especially useful if you’re making many identical cuts.
The Table Saw Approach
If you have access to a table saw, setting up for 45-degree cuts is generally more straightforward and often more accurate. The blade is already vertical, and you tilt the table itself to the desired angle. The fence of the table saw then provides a consistent reference for your cuts. Of course, table saws have their own set of safety considerations, so always be mindful!
Using a Circular Saw with a Track or Guide
For incredibly long or precise cuts, using a circular saw with a track or a straight edge guide is a game-changer. You can set your saw’s angle to 45 degrees, and then use the track to ensure the cut is perfectly straight and at the correct angle along the entire length of the wood. This is fantastic for larger projects where accuracy is paramount.
Remember, the goal isn't to become a master woodworker overnight. It's about learning, experimenting, and enjoying the process. Every time you successfully make a precise 45-degree cut, you're building confidence and expanding your DIY toolkit. So go forth, adjust that angle, and make some beautiful corners!