
Ah, the humble sprinkler head. It’s the unsung hero of a vibrant, green lawn and a flourishing garden. But sometimes, even our trusty watering companions need a little tweak to perform at their best. Adjusting the rotation of your Rain Bird sprinkler heads might sound like a chore, but trust us, it can be surprisingly satisfying! Think of it as giving your lawn the perfectly tailored drink it deserves. Plus, getting it right means you’re not wasting a single drop of precious water – and who doesn't love a smart, eco-friendly approach to lawn care? It’s a little bit of DIY magic that can make a big difference to your outdoor space.
Why Tweak Those Sprinkler Heads?
So, why bother fiddling with the settings on your Rain Bird sprinklers? It all boils down to precision and efficiency. Your lawn isn't a uniform patch of land; it has shady spots, sunny areas, slopes, and maybe even some flower beds that need a gentler touch. A sprinkler head that’s spraying water where it’s not needed is a wasted opportunity and, frankly, a bit of a watery nuisance. By adjusting the rotation, you can:
- Ensure Even Coverage: No more dry patches or waterlogged areas. You want a beautiful, consistent green across your entire lawn.
- Prevent Water Waste: Stop watering sidewalks, driveways, or the street. Directing water where it’s meant to go saves you money on your water bill and is kinder to the environment.
- Protect Your Landscape: Delicate plants or flower beds might not need the same drenching as your thirsty grass. Tailoring the spray ensures everything gets the right amount of hydration.
- Combat Wind Drift: Windy days can send your sprinkler’s spray way off course. Adjusting the arc can help minimize this.
- Optimize for Different Zones: If you have different types of plants or varying sun exposure across your yard, you can set up your sprinklers to cater to each specific need.
Essentially, it's about making sure every drop of water lands exactly where it's supposed to, maximizing the health and beauty of your garden while minimizing waste. It’s a win-win for your lawn and your wallet!
The Magic Tool: Your Sprinkler Adjustment Key
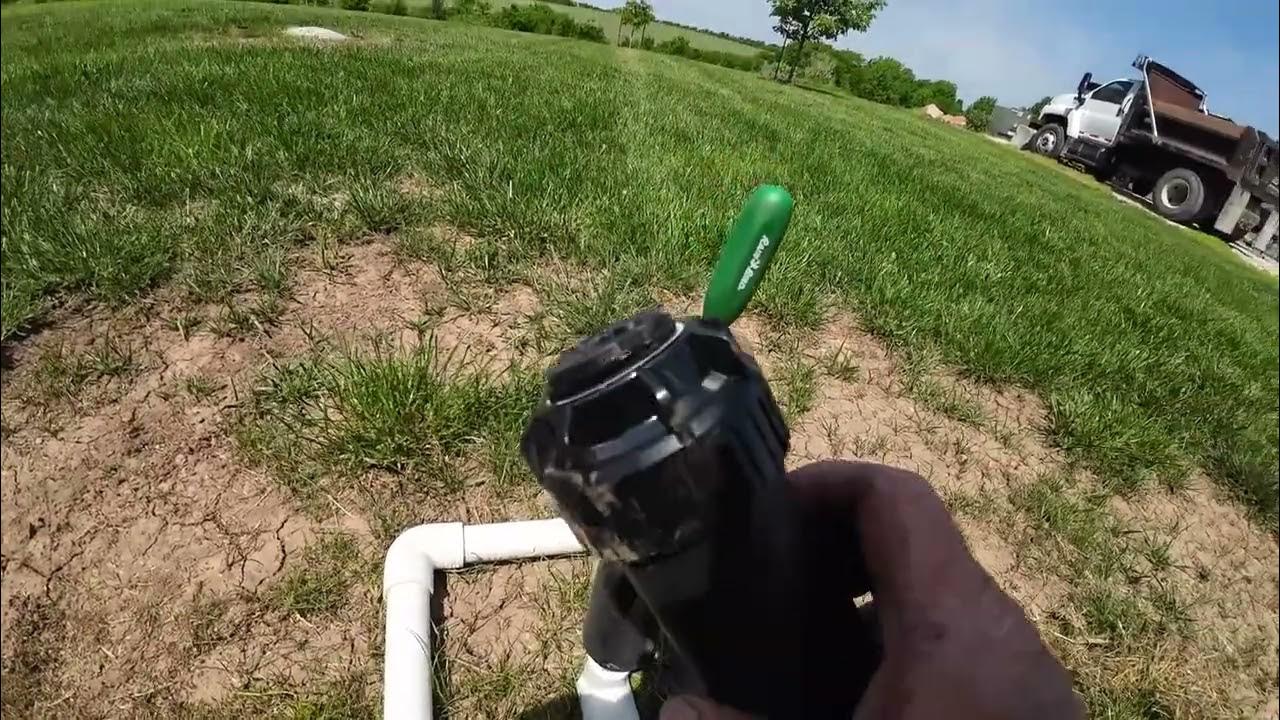
For most Rain Bird sprinkler heads, you'll need a special tool – often called a sprinkler adjustment key or a radius adjustment tool. These are usually small, flat plastic tools with a slot at one end. You might have received one when your sprinklers were installed, or you can easily find them at your local hardware store or garden center. Some newer models might have slightly different mechanisms, but the principle remains the same: a way to fine-tune the spray pattern.
Let's Get Adjusting!
Ready to become a lawn-watering wizard? Here’s a breakdown of how to adjust the rotation of your Rain Bird sprinkler heads. Remember, different models might have slightly different features, but these steps cover the most common adjustments.
Step 1: Identify Your Sprinkler Type
First things first, take a stroll around your yard and identify the different types of sprinkler heads you have. The most common types for residential use are:
- Rotors: These are the ones that spin and shoot a stream of water. They usually have a larger spray radius and are good for covering larger areas.
- Pop-up Sprays (or Nozzles): These have fixed spray patterns and are often used in smaller areas or for more precise watering.
The adjustment process is generally similar, but the specific parts you interact with might differ slightly.
Step 2: Turn On the Water (Briefly!)
You'll need to see the sprinkler in action to make accurate adjustments. Turn on your irrigation system for a short burst of time – just enough to get the sprinkler head to pop up and start spraying. You don't need a full watering cycle for this!
Step 3: Adjusting the Arc (Full Circle vs. Part Circle)
This is where you set how far the sprinkler rotates. Most Rain Bird rotor sprinklers are adjustable from a full 360 degrees down to a specific arc, say 90 degrees or 180 degrees. This is crucial for targeting specific areas and avoiding watering unwanted surfaces.
How to do it:
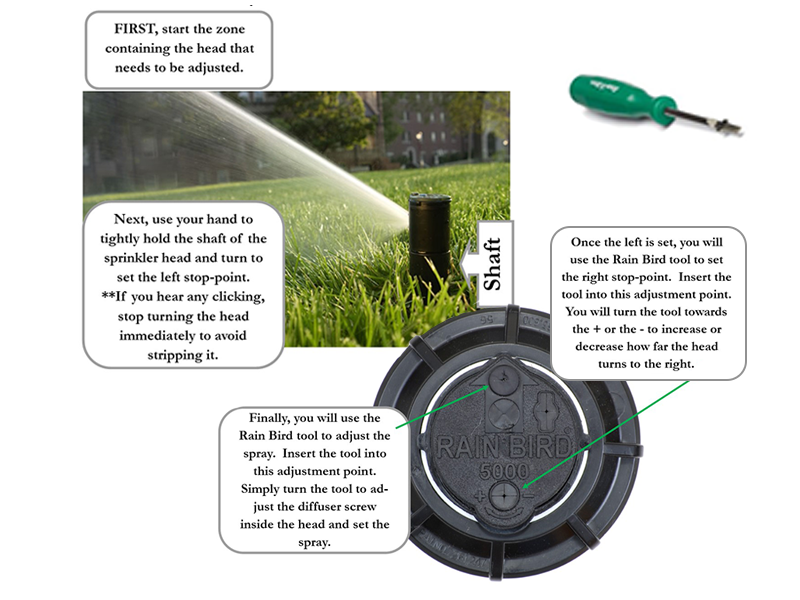
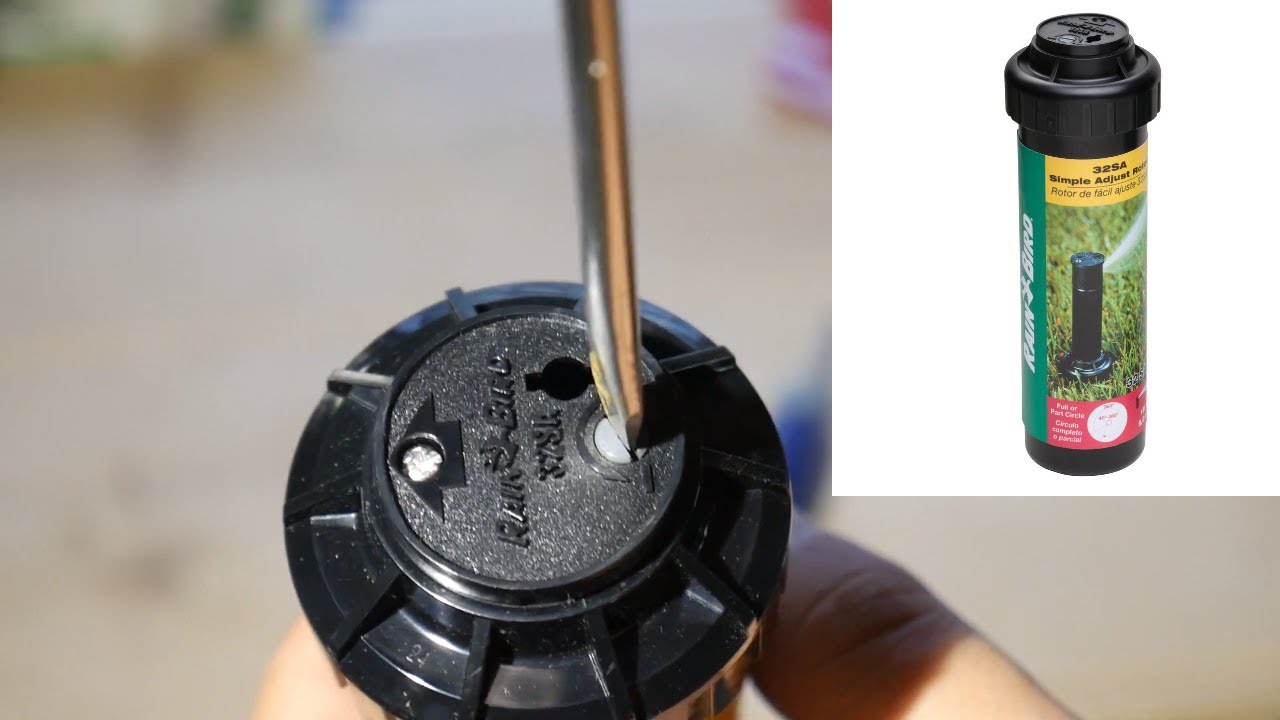
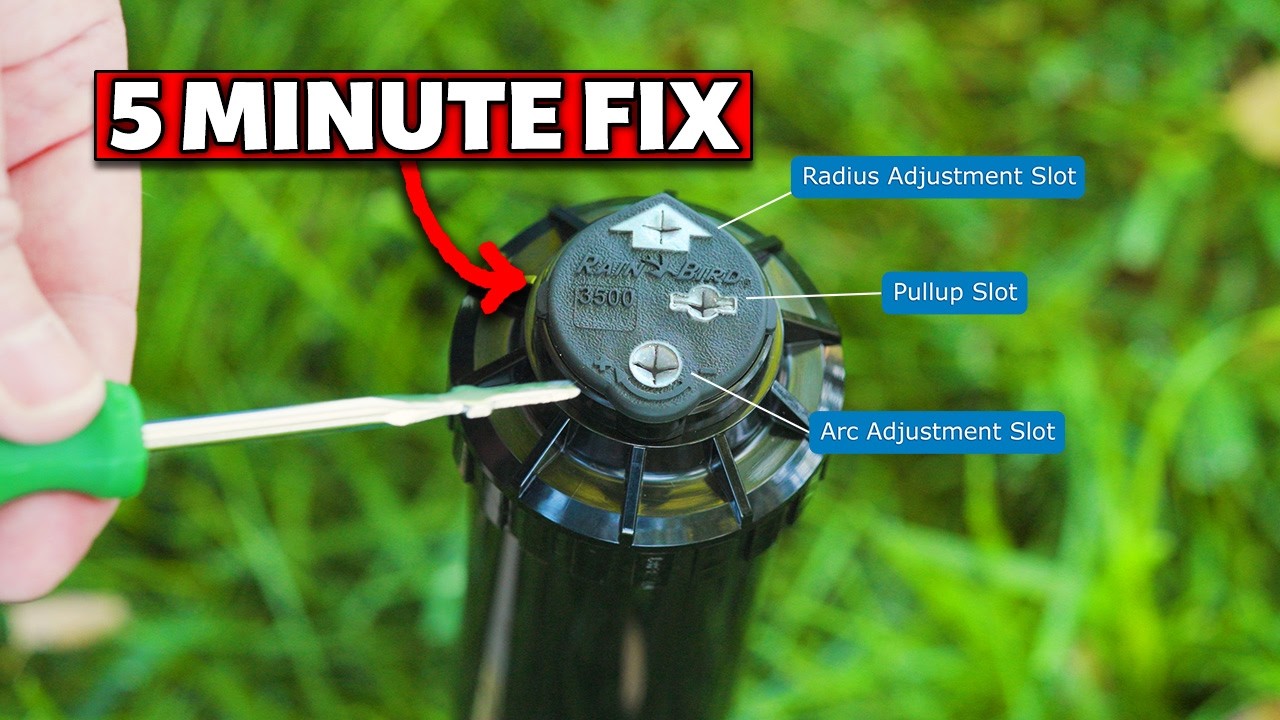
- Locate the Adjustment Screw/Mechanism: On the top of many Rain Bird rotors, you’ll see a small screw or a slot.
- Use Your Adjustment Key: Insert your sprinkler adjustment key (or a flathead screwdriver if the slot is large enough) into this screw.
- Turn to Adjust:
- To decrease the arc (make it spray less distance): Typically, you’ll turn the screw clockwise.
- To increase the arc (make it spray more distance): Typically, you’ll turn the screw counter-clockwise.
- Watch and Test: As you turn the key, watch the sprinkler head. You should see the spray arc change. Continue adjusting until you achieve the desired coverage. You might need to let the sprinkler complete a full rotation (or several) to see the full effect.
- Check Both Directions: Many adjustable sprinklers allow you to set the left stop and the right stop. You might need to manually move the sprinkler head to its furthest left position and adjust the stop, then move it to its furthest right position and adjust that stop. This defines the total sweep of the sprinkler.
Pro Tip: Start with a wider arc and then gradually decrease it until you’re precisely hitting your target area. It’s easier to dial it back than to overshoot!
Step 4: Adjusting the Radius (Spray Distance)
Sometimes, the problem isn’t how far it spins, but how far the water shoots out. This is known as the radius. You want the water to reach the end of your lawn but not blast into the neighbor’s yard or onto your patio.
How to do it:
- Find the Radius Adjustment Screw: On some Rain Bird sprinkler heads (especially rotors), there’s a separate screw or adjustment point for the radius. It might be a small screw on the top of the unit or sometimes accessible from underneath.
- Use Your Adjustment Key: Again, your adjustment key or a flathead screwdriver will be your friend here.
- Turn to Adjust:
- To decrease the spray distance (shorter radius): Usually, you’ll turn the screw clockwise.
- To increase the spray distance (longer radius): Usually, you’ll turn the screw counter-clockwise.
- Test the Reach: Observe how far the water is now reaching. Adjust until the spray just reaches the edge of the area you want to water.
Important Note for Pop-Up Sprays: For pop-up spray nozzles, the radius is often determined by the nozzle itself. Rain Bird offers a variety of nozzles with different spray patterns and radii. If you need to significantly change the spray distance on these, you might need to replace the nozzle with one that has a different radius specification. Some nozzles, however, do have a radius adjustment screw (often a small screw on the top of the nozzle). Check your specific nozzle model.
Step 5: Fine-Tuning and Observation
Once you’ve made your adjustments, let the sprinklers run for a full cycle. Walk around your lawn and observe. Are there any dry spots? Are you still watering areas you shouldn’t be? Make any necessary fine-tuning adjustments. It might take a couple of tries to get it absolutely perfect.
A Little Goes a Long Way
Adjusting your Rain Bird sprinkler heads is a straightforward process that can yield significant benefits. It’s about smart watering, healthy plants, and a beautiful yard. So, grab that adjustment key, embrace your inner landscape architect, and give your lawn the precise, efficient drink it deserves!
Remember, a little bit of tinkering can go a long way in creating a perfectly watered and vibrant outdoor space. Happy watering!


