So, picture this: it was a scorching July afternoon, the kind where even the mosquitoes are taking a siesta. I’d finally decided to tackle that overgrown beast of a lawn, the one that was rapidly approaching Alp-like proportions. I pull out my trusty, albeit a bit rusty, old push mower, a true workhorse. I give the pull cord a good yank, expecting that familiar, comforting roar of the Briggs & Stratton engine. Silence. A deafening, mocking silence. I try again. Nothing. Nada. Zip. My heart sinks a little. I’m thinking, “Oh no, not today, Satan’s overgrown grass!” After a few more futile attempts, accompanied by an increasingly colorful vocabulary (you know the kind), I remembered. The carburetor. It was probably acting up. Just like it always does when I’m in a pinch.
That’s the thing, isn't it? Your lawnmower, that trusty companion, often chooses the most inconvenient times to throw a tantrum. And more often than not, when an engine sputters, stalls, or refuses to start at all, it’s pointing a greasy finger right at the carburetor. It’s the little engine that could, until it can’t, and then we’re left staring at a pile of useless metal and a jungle masquerading as a backyard.
The Carburetor: The Engine's Underrated Hero (or Villain)
Let’s talk about this little guy, the carburetor. It’s not exactly the most glamorous part of your engine, is it? It doesn’t have the brute force of the pistons or the satisfying rumble of the exhaust. But oh boy, is it crucial. Think of it as the chef in the engine’s kitchen. It takes the raw ingredients – fuel (gasoline) and air – and mixes them in just the right proportions to create the perfect combustible blend that powers your machine. Too much fuel, and it’ll choke and sputter. Too little, and it’ll starve and die. It’s a delicate balance, and when that balance gets thrown off, well, you get the symphony of despair I was experiencing on that hot July day.
Why do they get out of whack, you ask? It’s usually down to a few common culprits. Dirt and debris are the usual suspects. They can clog up those tiny passages inside the carb, messing with the fuel flow. Old, stale fuel is another major offender. Gasoline can break down over time, leaving behind sticky residues that gum up the works. And sometimes, just plain old wear and tear can cause things to loosen up or malfunction.
When is it Time to Play Mechanic? Signs Your Carburetor Needs Some Love
So, how do you know if your Briggs & Stratton carburetor is the black sheep of your engine’s family? Here are some tell-tale signs. If your mower is hard to start, takes a million pulls to get going, or simply refuses to fire up, that’s a classic. Does it sputter and die when you try to engage the blades, or when it’s running? Yup, carburetor. Does it run rough, like it’s got a bad case of the hiccups? Another one for the carb. And if you notice it leaking fuel, or if you’re constantly smelling gas, that’s a pretty clear indication that something’s not right in the fuel delivery department.
Don't be intimidated! Most of these issues are actually fixable without needing to call in the cavalry or sell a kidney. You can totally do this. Seriously. It might seem daunting at first, especially if you’re not used to tinkering with engines. But with a little patience and the right approach, you can bring your little powerhorse back to life.
Pre-Flight Checks: What You Need Before You Dive In
Before you even think about unscrewing anything, let’s get you prepped. You don’t want to be halfway through the process and realize you’re missing a crucial tool. First off, safety first! Always disconnect the spark plug wire before you start working. This is non-negotiable. You don't want any unexpected surprises, trust me. Wear some gloves; engine grease is tenacious stuff.
Tools you’ll likely need:
- A socket set or wrench set (metric and/or imperial, depending on your mower)
- Screwdrivers (flathead and Phillips)
- Pliers
- A clean rag or paper towels
- Carburetor cleaner (aerosol type is handy)
- A small brush (an old toothbrush works wonders!)
- Maybe some compressed air, if you have it.
- A container to catch any spilled fuel.
- Fresh gasoline, of course, for when you’re done!

And, crucially, try to find a clean, well-lit workspace. Nobody likes fumbling around in the dark with greasy hands. Think of it as a spa day for your mower… a very greasy spa day.
Step-by-Step: Unveiling the Carburetor’s Secrets
Alright, let’s get down to business. We’re going to tackle this one step at a time. Don’t rush. Enjoy the process. It’s like solving a puzzle, but one that ultimately rewards you with a roaring engine! (Okay, maybe not roaring, but definitely running.)
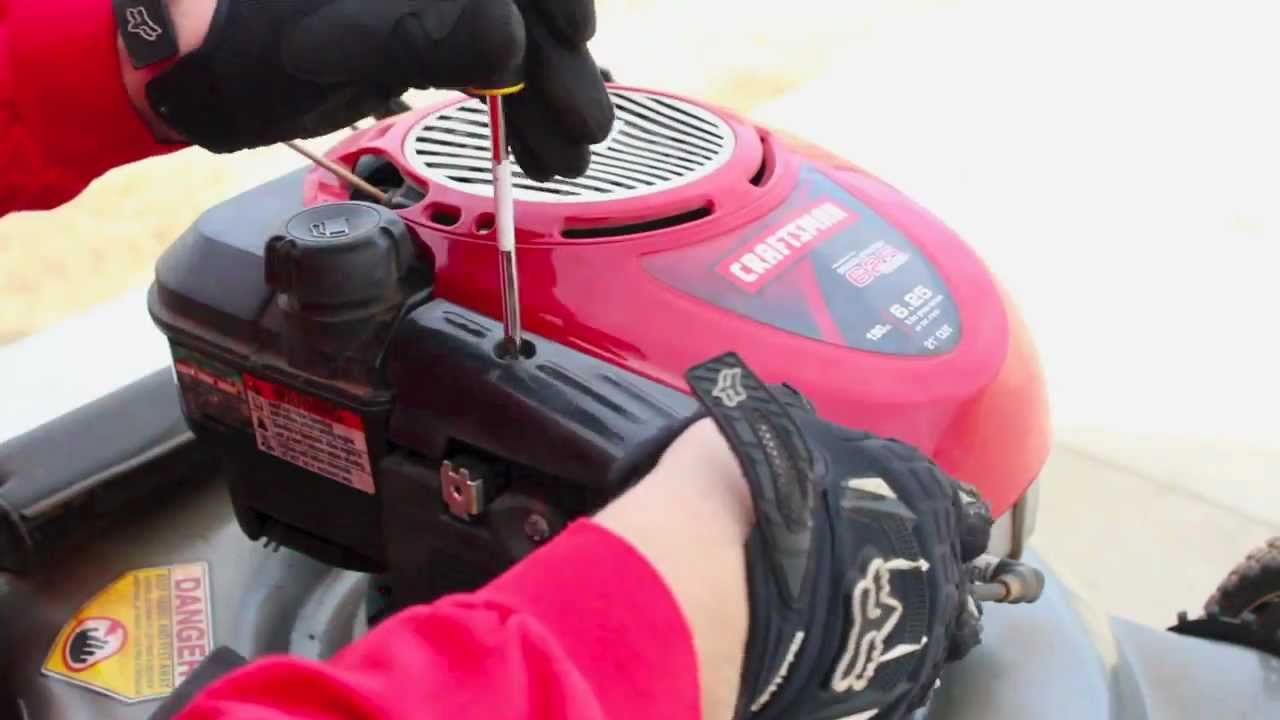
Step 1: Locate and Remove the Carburetor
First, you need to find the darn thing. It’s usually located on the side of the engine, connected to the air filter housing and the intake manifold. You'll see fuel lines going into it. Take a good look at how everything is connected. A quick snap of your phone’s camera can be a lifesaver here, trust me. It’s like a cheat sheet for reassembly.
You’ll probably have to remove the air filter housing to get clear access. This is usually held on by screws or wingnuts. Once that’s off, you’ll see the carburetor more clearly. There will be a few bolts or nuts holding it to the engine. Carefully remove these. Be mindful of any gaskets; they might be fragile.
You’ll also need to disconnect the fuel line. There might be a clamp holding it on. Gently pull it off. Have your catch container ready, as a little fuel will likely spill out. And, remember, spark plug wire off!

Step 2: The Gentle Disassembly
Now that you’ve got the carburetor off the engine, it’s time for a closer inspection. Don’t go waltzing in with a hammer! This is delicate work. Look for any obvious signs of damage, like cracked parts or bent metal.
Most carburetors have a few key components that are prone to clogging. You’ll likely see a float bowl at the bottom. This is where fuel collects. There’s usually a single bolt or nut holding it on. Unscrew it, and carefully remove the bowl. Be prepared for a bit more fuel to come out.
Inside the float bowl, you’ll probably see a float. This looks like a little plastic or metal gizmo that floats on the fuel. It’s connected to a needle valve. The float’s job is to maintain the correct fuel level in the bowl. If the float is stuck or the needle valve is gummed up, it can cause all sorts of problems.
You might also see a main jet and a pilot jet (sometimes called an idle jet). These are tiny brass screws with very small holes through them. These are the most common culprits for clogging. They control the fuel flow at different engine speeds. If they’re plugged, your engine won’t run right.
Step 3: Cleaning Time! The Grime-Fighting Mission
This is where the magic happens (or at least, where the dirt leaves!). Grab your carburetor cleaner. You want to spray this into all the little passages and holes you can find. Pay special attention to the jets. Make sure the cleaner goes through the tiny holes. If you have compressed air, a quick puff can help blow out any loose debris after spraying.
Use your small brush to gently scrub any visible gunk off the float, the needle valve, and the inside of the float bowl. You want everything to be squeaky clean. If you’re feeling particularly brave and the carburetor looks really nasty, some people might recommend a soak in a specialized carburetor cleaner solution. Just be sure to follow the product’s instructions very carefully, as some can be harsh. For most everyday problems, a good spray and scrub will do the trick.
Inspect the float and needle valve closely. If the needle valve tip looks worn or damaged, it might be time for a replacement. The same goes for any rubber gaskets or O-rings that look cracked or brittle.
Step 4: Reassembly: Putting Humpty Dumpty Back Together
Now, carefully put everything back together in reverse order. Make sure those jets are seated correctly. Don't overtighten anything; you don't want to strip the threads or crack a plastic part.
When you reattach the float bowl, make sure any gasket is in good condition. You don't want fuel leaking out of there. Once the carburetor is back in one piece, it’s time to put it back on the engine.
Remember to reconnect the fuel line and secure it with the clamp. Reattach the air filter housing. And finally, and this is the moment of truth, reattach the spark plug wire. Feel that little click? That’s the sound of hope!
The Moment of Truth: Will It Run?
With everything reassembled, it’s time for the big reveal. Get your mower in a safe, open area. Grab the pull cord. Take a deep breath. And give it a good, firm pull. If you’ve done your job right, you should hear that familiar, glorious sound of your Briggs & Stratton engine coming to life.
It might take a couple of tries, but if it fires up and runs smoothly, or at least better than before, then congratulations! You’ve just performed a minor miracle. You’ve saved yourself some money and the indignity of a lawn that’s turning into a miniature forest. High fives all around!
Troubleshooting: When Things Still Go Sideways
Now, what if it doesn't work? Don’t despair! It happens. Here are a few things to check:
- Spark Plug: Is it firing? Sometimes a fouled spark plug can mimic carburetor problems.
- Fuel: Is the fuel fresh? Stale gas is the enemy.
- Air Filter: Is it clean? A clogged air filter can starve the engine of air.
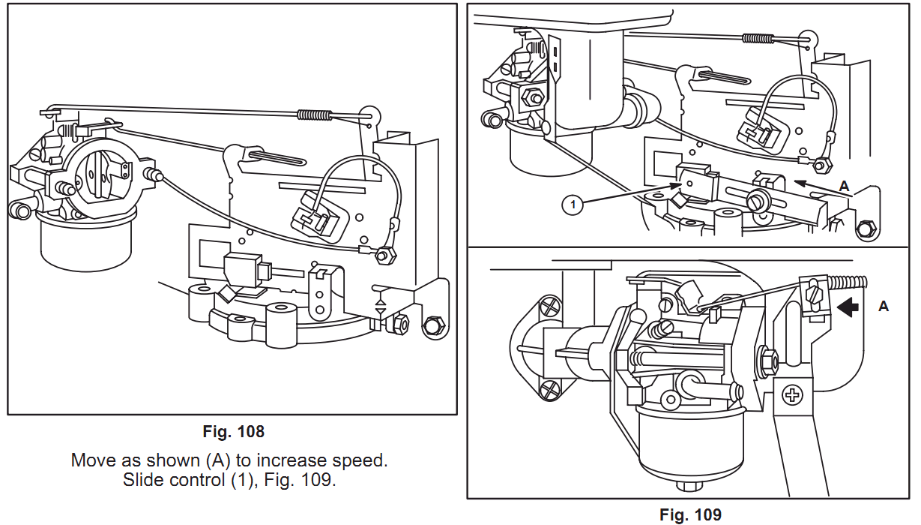
- Linkages: Are the throttle and choke linkages moving freely and connected properly? Sometimes these can get sticky or disconnected.
- Jets: Did you clean them thoroughly? Even a tiny bit of debris can cause issues.
If you’ve gone through all these steps and your engine is still giving you grief, it might be time to consider that the carburetor is beyond a simple clean-up, or there might be another issue at play. In that case, you might need to look into replacing the carburetor. They aren’t usually that expensive, especially for older Briggs & Stratton engines, and a new one can be like a fresh start.
Proactive Maintenance: The Key to Avoiding Future Drama
The best way to deal with carburetor problems is to prevent them in the first place. It’s like brushing your teeth – a little effort now saves you a lot of pain later.
Here are a few tips:
- Use fresh fuel: Don’t let gas sit in your mower for months on end. If you’re not going to use it for a while, use a fuel stabilizer.
- Drain the fuel: Before storing your mower for the off-season, it’s a good idea to run the engine until it runs out of fuel, or to drain the tank completely. This prevents stale fuel from gumming up the carburetor.
- Keep it clean: Regularly clean around the engine and air filter housing. A clean engine is a happy engine.
- Regular checks: Periodically check the air filter and give it a clean or replace it if it’s looking rough.
By taking these simple steps, you’re significantly reducing the chances of your Briggs & Stratton carburetor staging a protest the next time you need it. You'll be the hero, not the one cursing at a silent engine. So, go forth and conquer that lawn! You've got this.