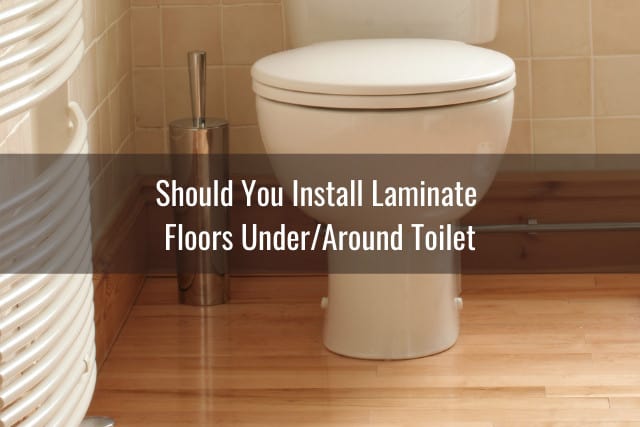
So, you've bravely embarked on the grand adventure of installing laminate flooring! You’ve clicked planks together like a master builder, conquered the kitchen, and even tamed the tricky hallway. But now, you’ve encountered… The Toilet. That porcelain throne, standing sentinel in your bathroom, is looking less like a king and more like a giant, immovable roadblock to your flooring dreams. Fear not, brave DIYer! This is where the real fun begins.
Don't let that ceramic sentinel intimidate you. It's just a big, fancy cup, really. And we’re going to treat it like one – by cleverly working around it. Think of it as a very important, very permanent guest who gets their own custom-made carpet. We're not going to disturb their regal resting place, oh no. We're just going to make the floor look stunning all the way up to their majestic base.
This isn’t rocket science, folks. It’s more like… toilet archaeology. You're carefully excavating the shape of the past to create the perfect foundation for the future. And your main tools for this expedition? A measuring tape, a pencil, and a generous dose of “I can totally do this!” spirit. And maybe a slightly bewildered cat for moral support, though their input is usually limited to naps.
First things first, grab your trusty pencil. This is your magic wand for this part of the operation. Imagine you’re drawing a very important, very precise outline. You’re not just drawing a circle, you’re sketching the aura of the toilet. You want to capture its essence, its very being, in pencil on your laminate plank.
Now, before you go all Picasso on your flooring, let's get those measurements right. This is where the measuring tape becomes your superhero cape. You want to be precise, like a surgeon… but with less formaldehyde and more clicking sounds. Measure the distance from the wall to the center of the toilet, and then its widest points. Accuracy is your best friend here, like that friend who always remembers your birthday and never borrows your favorite sweater without asking.
Okay, you’ve got your measurements. Now, let’s transfer that toilet aura onto your chosen laminate plank. Think of this as creating a stencil, a toilet-shaped ghost that you’ll be cutting out. Draw your rough circle, then refine it. You’re aiming for a snug fit, a hug for the toilet’s base.
But wait! You don’t want to cut a perfect circle, do you? That would be far too simple. We need to account for the fact that toilets aren't just simple cylinders. They have curves! They have a little bit of… toilet personality. So, your outline needs to reflect that.
This is where the real artistry comes in. You’ll likely need to make a few cuts, not just one big circle. Think of it as creating a puzzle piece. A very, very specific puzzle piece designed to fit snugly around a certain porcelain object. It’s like giving your toilet a custom-made sock, but made of laminate.
Don't be afraid to be bold with your pencil. Make those lines clear. This is your blueprint for success. Imagine you’re a cartographer charting unknown territory – the land of the bathroom floor, with the toilet as its crowning mountain.
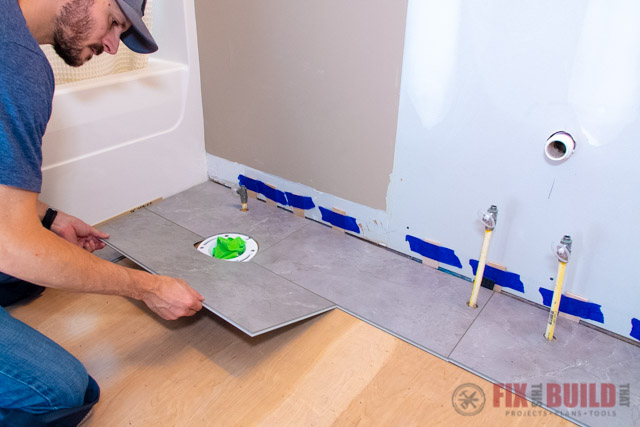
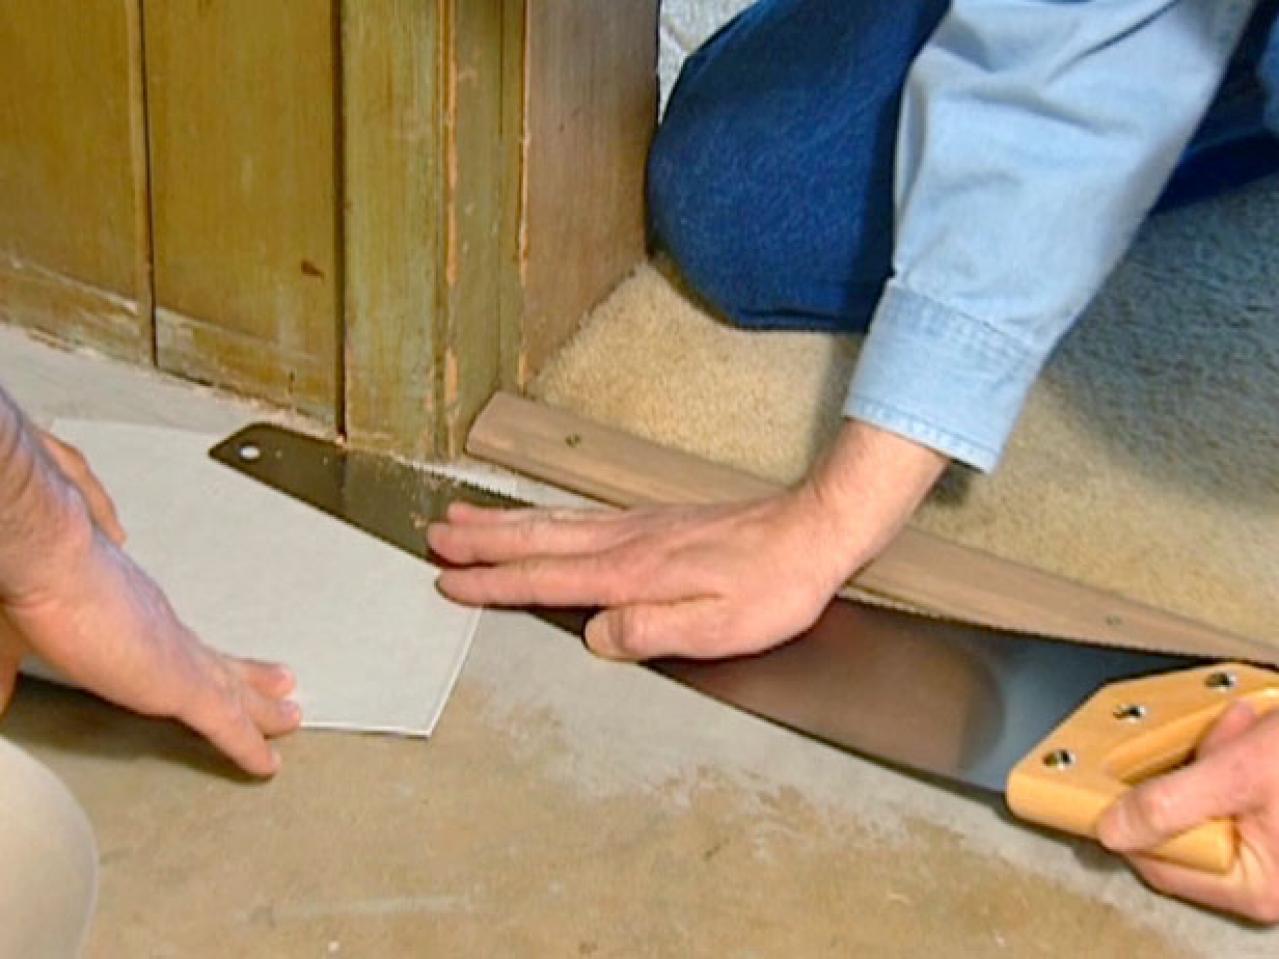
Now, grab your jigsaw. This is your trusty steed, ready to carve out your masterpiece. Don't be shy. Take a deep breath, and let your pencil lines guide you. It might feel a little intimidating at first, like facing a dragon, but remember, this dragon breathes dust, not fire.
As you cut, go slowly. It’s better to cut a little less and have to shave it down than to cut too much and have a gaping void. We want a tight seal, a hug, not a gaping maw. Think of yourself as a sculptor, carefully chipping away until the perfect form is revealed.
Remember those curves? You'll likely need to make a few strategic cuts to get around them. This is where you might need to make a few "relief cuts" – small slits that allow you to bend the laminate slightly to fit the toilet's contour. It’s like giving your laminate a little wiggle room, a polite nod to the toilet’s elegant shape.
And if it’s not perfect the first time? Who cares! This is laminate flooring, not the Mona Lisa. You can always adjust. Trim a little more here, sand a little there. It’s all part of the glorious, messy, wonderfully DIY process. Think of it as a learning experience, like that time you tried to bake a cake without a recipe. Some edible, some… less so.
Now, here’s a pro-tip, a little secret handshake for laminate installers: always test fit! Before you permanently click that plank into place, slide it around the toilet. Does it hug it like a long-lost friend? Or does it leave a gaping canyon where dust bunnies will hold their annual convention?
If it’s a little too tight, a gentle tap with a rubber mallet can sometimes work wonders. If it’s a bit loose, that's where your trusty pencil and jigsaw come back into play for a quick touch-up. It’s an iterative process, like fine-tuning a musical instrument. You’re aiming for harmony.
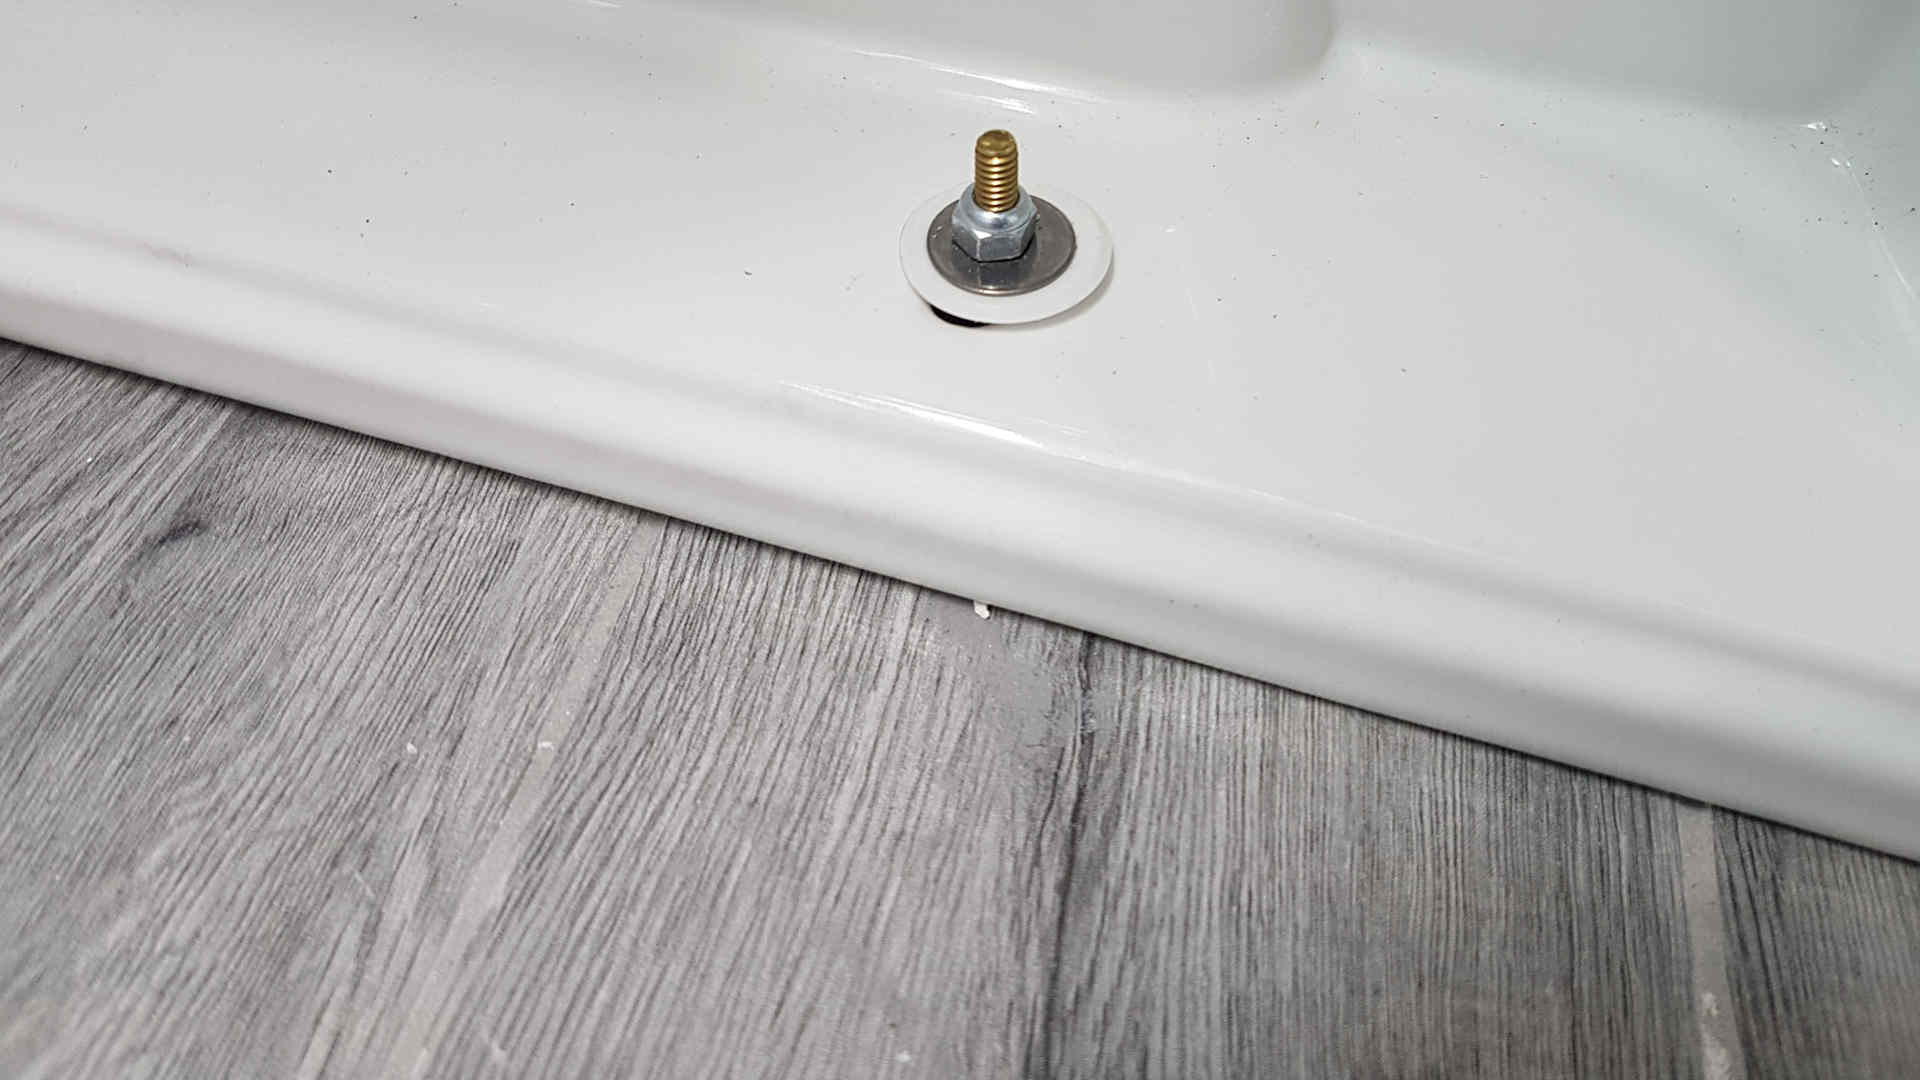
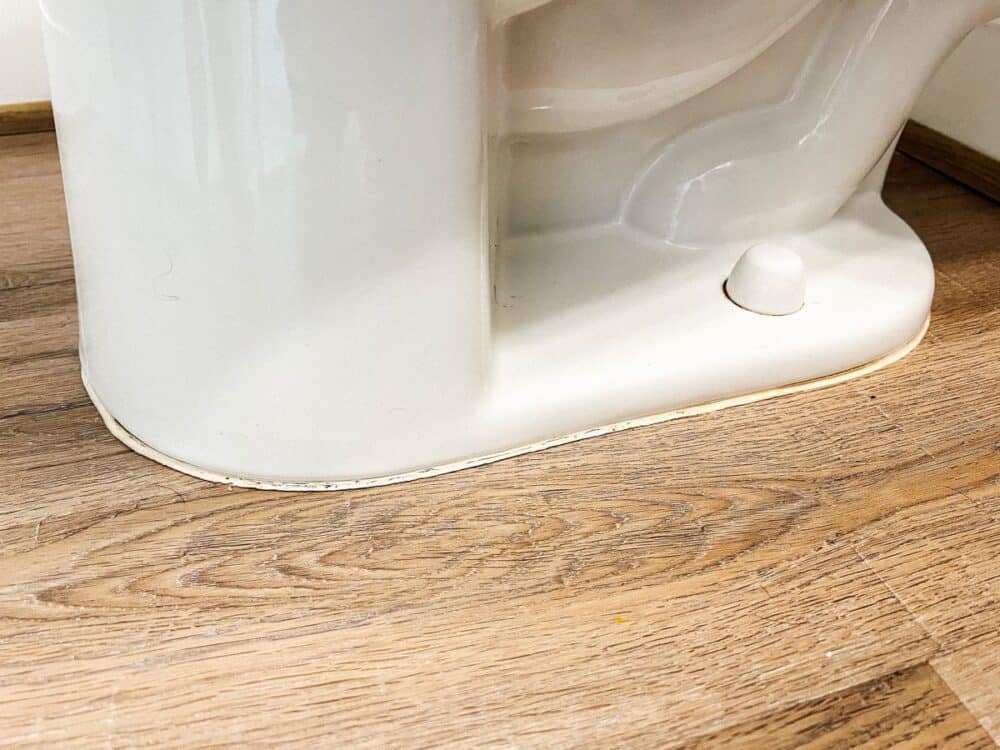
And don’t forget the small gaps. You’re not aiming for a hermetically sealed environment around your toilet. A tiny, almost imperceptible gap is perfectly fine. It allows for the natural expansion and contraction of the laminate. Think of it as giving your floor a little breathing room, a polite sigh of relief.

Once you’re happy with the fit, it’s time to secure that plank. You’ll likely click it into place with the surrounding planks, and then the toilet base will hold it firmly. It's like giving the toilet a gentle, supportive embrace. No screws or glue needed around the toilet itself, as long as your cuts are good. The weight of the throne does the heavy lifting.
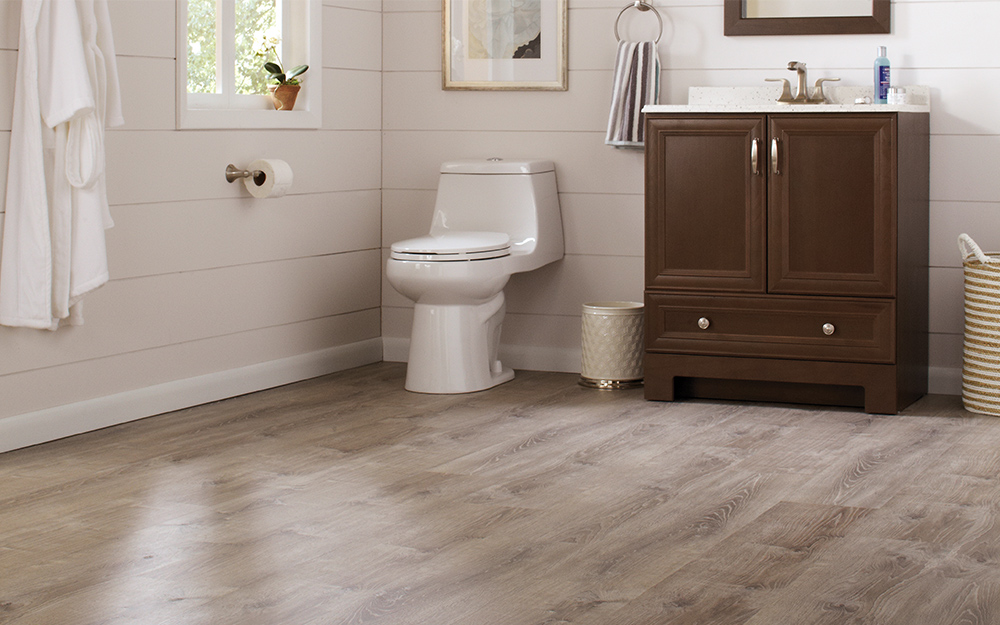
And then, my friends, you’ve done it. You’ve conquered the toilet! You’ve wrestled with the porcelain beast and emerged victorious, with a beautifully fitted floor. Give yourself a pat on the back. You’ve earned it. You are now officially a laminate flooring legend, capable of taming even the most stubborn bathroom fixtures.
Imagine the satisfaction! You can now look at your bathroom floor and say, “I did that!” Every time you… well, you know… you’ll be reminded of your triumph. It’s a small victory, perhaps, but a significant one in the grand tapestry of home improvement. The toilet has been respected, the floor is fabulous, and you are a DIY hero. High fives all around!
So, next time you’re staring down that toilet, contemplating the vastness of the flooring project, remember this: it’s just a shape. A slightly awkward, somewhat essential shape, but a shape nonetheless. And with a little patience, a lot of measuring, and a dash of fearless cutting, you can make your laminate flooring fit like a glove. You’ve got this! Now go forth and conquer those commodes!